Recipes from an Edwardian Country House

Recipes from an Edwardian Country House is a book that was repackaged from an earlier book. Frankly, I hate it when publishers do this sort of thing, as I often have the first book and then end up with another copy of the same book .

Seasonal Recipes From The Garden

For a long time my cable provider didn't provide a PBS station. It seemed weird, no PBS, but I learned to live it. After changing providers, I suddenly had PBS again.

Favorite Recipes of Famous Men

We are suckers for collections of recipes by "famous" folk. So naturally, Favorite Recipes of Famous Men a 1949 cookbook collection by Roy Ald is a great one.

Spoonbread and Strawberry Wine

There is not a single member of Norma Jean and Carole Darden's family that you want to hang out with. While most of them are gone now, they live on in this delightful cookbook and memoir.

Recipes from an Edwardian Country House

Recipes from an Edwardian Country House is a book that was repackaged from an earlier book. Frankly, I hate it when publishers do this sort of thing, as I often have

Monday, April 29, 2013

BAKED POTATO CHIPS

When I am on a diet, (who am I kidding, I'm always on a diet) my weight loss plan starts to falter when I get a craving for something crunchy and salty. I'm not talking about raw fruits and veggie type of crunchy, I'm talking about potato chip crunchy. If I ignore this craving, it just gets stronger; does that sound familiar to anyone?

I did some online searching for a remedy to my craving that wouldn't have a billion calories. I found three different recipes for baked potato chips that sounded promising.

After trying all three (and immediately tossing all three into the garbage), I decided to make up my own version. I must say I'm quite pleased with it. 

Not only does this little recipe completely satisfy my "crunchy chip craving" but the ENTIRE RECIPE only has one tablespoon of olive oil!!
 
Wash and dry six golf ball size Yukon gold potatoes. Slice them as thin as possible. A mandolin would work well for this, but I just used my sharpest knife and sliced them; just try to make them all an even thickness.

 
Toss the sliced potatoes with 1 tablespoon of olive oil, making sure that a little of the oil gets in between every slice. Lay the slices out on a heavy cookie sheet that has been lightly sprayed with vegetable spray, then sprinkle the potatoes lightly with kosher salt.

Baking time is important. One of the recipes I tried (and threw away) called for 2 hours at 200°F. That produced a dull, leathery piece of potato. I even let it cook an extra HOUR and it was still leathery...yuck.  Another recipe called for 18 minutes at 400°F which produced a crisp but burnt taste...yuck again.

So I decided to try Yukon gold potatoes. How long you bake them will depend on how thick you sliced your potatoes and how hot your oven runs. I baked mine in a 375°F electric oven for 22 minutes, flipping them over half way through the baking time....just right.


These chips are meant to be eaten right away because they are not meant to be stored like a commercial potato chip. There are small "non-crunch" parts on the chips that would not store well.

I hope you will try these. They have a WONDERFUL flavor and a fantastic, salty crunch!!!

NOTE:  Watch the chips closely the last couple of minutes because once they start to turn golden, they darken quickly.

Thursday, April 25, 2013

SIX MICROWAVE COOKIES

This fun little recipe is for those "I-need-some-chocolate-right-now-or-I'm-going-to die" moments in your life. Cookies from the microwave? Before today, I would have highly doubted their success, but my scorched tongue is proof that they ARE good AND that I was too impatient for them to cool off!!

This recipe only makes six small cookies, which is PERFECT better for my perpetual diet. Don't expect the same crispy cookie you would get out of the oven, but the taste is very much the same.

1 tablespoon butter (melted)
2 tablespoons brown sugar
1/4 teaspoon vanilla
pinch salt
1 egg yolk
1/4 cup all purpose flour
2 tablespoons chocolate chips

Mix everything and form into 1" balls, then flatten a little and put them on an UNgreased microwave safe plate. They don't spread much when they cook, so just put them an inch or so apart.

Microwave on high for 45-55 seconds (my microwave took 50 seconds). Now is the hard part......let them cool for a couple of minutes....then enjoy!!

NOTE: Do not be tempted to add any baking soda to this recipe.

Pig Curing & Cooking


We are big fans of Ambrose Heath and pigs.  The End. 

No, there is more.  We love cookbooks and food because, like so many things, everything old is new again.  Really, who hasn't dislocated a shoulder patting themselves on the back for serving pig ears?  Don't get me wrong, we love Fergus Henderson but he did not "invent" nose-to-tail eating.  Poor folks did.  If H.G. Wells traveled back in time and asked those poor folks whether they would rather be eating pig ears or steak, they would probably chosen the latter.  If you told them that you paid $12 for a pig ear sandwich, they would laugh at you.   Truthfully, they would probably rob you.  And feed you to the pigs.

In 1952, a full decade before Fergus Henderson was even conceived, Ambrose Heath wrote a quintessential nose-to-tail book on the pig: Pig Cooking & Curing.  There are recipes for Deviled Pig's Liver, Pig Ear Soup(and you thought they were only for sandwiches), Baked Pig Cheek, Pig Tail in Lentils, and so much more.  Heath includes all the meaty middle of the pig as well, loins, legs, chops, hams, and sausage. 

By now you know that cookbooks of this era have only vague directions for recipes.  But here is a favorite.  It has the date 1806 in parentheses, so my guess is Heath found this recipe and passed it on.  I love it for the title: Loin of Pork to Goosify.  I can honestly say we have have never seen the word "goosify" before.  At first I thought it was a way to make one's pork more like goose.  But that doesn't seem to be the case.   In modern parlance, "goosify" means to have an old lady grab your ass.  By "old" one would need to be over 30, 25 in some video arcades.  But we can find no reference as to why this leg of pork is being "goosified" or whether "goosified" is the past tense for "goosify" as we are sure it has nothing to do with grabassing pork (or whether "grabassing" is a word).   We are in uncharted territory.  Here is the recipe so you too, can gossify your leg o'pork.

Leg of Pork, to Goosify (1806)

Score your pork; stuff it with sage, onions, pepper and salt, a few crumbs and a little butter; stuff it at the shank end.  It will take two hours roasting as a good fire.  Serve it with apple sauce.
Calling all Lexicographers out there -- what did "goosify" mean in 1806?

In the meantime, we saw this on Facebook and while we rarely  never share puppy pix, quotes, blessings from any Deity, or school day photos, we did find this amusing and a bit apropos.

Twenty years ago we had Johnny Cash, Bob Hope and Steve Jobs.  
Now we have no Cash, no Hope, and no Jobs
PLEASE
Don't let Kevin Bacon die


Monday, April 22, 2013

Cookery From Experience


It has been so cold this week I have actually been thinking of making a fruit cake.   So I started pulling out some really old books to check out long ago and far away recipes.   I have a rather beaten up copy of Sara Paul's Cookery from Experience.  Written in 1875, Mrs. Paul book bears all the marks of the early cookbooks, including a good bit of information on housekeeping as well as tried and true methods for such things as removing tar and storing meat in hot weather. 

Removing tar required "soaking" it in lard, which begs the question, how then does one get the lard stain out?  Well that is another day...

I lust love flipping through these cookbooks from the late 1800's.  While there are seriously dated offerings, one can find recipes that seem to have been written by today's most innovative chefs.  


Mrs. Paul offered up several fruit cake recipes, but this one sounded the most promising. 

Fruit Cake, No. 1

One pound of butter, the same of sugar and flour, ten eggs, one pound of raisins seeded, one of currants washed and dried, and half a pound of citron cut in little strips. Stir the butter and sugar to a cream, add to them half a small nutmeg grated, a pinch of cinnamon and the rind of half a lemon grated; stir well; then add the yolks of the eggs beaten light; stir these well together, and then add the flour alternately with the whites of the eggs beaten to a froth; mix the fruit altogether, and stir in it two heaping tablespoons of flour, and stir it in the cake. Bake slowly nearly two hours; if browning too much, cover with thick paper. When the cake shrinks from the sides of the pan, and a broom splint run down the centre of the cake comes out clean and dry, the cake is done; and this is the test for all kinds of cake.


I have all of the ingredients and believe I shall go home, build a fire, and make cake.   Who would think it is just a week away from May...

Sunday, April 21, 2013

Two Ingredient Cake !!

This cake couldn't be easier and it is light and refreshingly delicious. It is great for any occasion, but PERFECT when you have to have a last minute dessert.

It only takes two ingredients, mixed together with a spoon...Easy-Peasy!!

1  box of angel food cake mix (dry mix nothing else)
1  20 ounce can of crushed pineapple (do not drain)

That's it!!  Mix in a large bowl because it really foams up as you stir. Pour it into a 9 x 13 baking pan (sprayed with vegetable spray) and bake it at 350 for 25-30 minutes (my electric oven took about 28 minutes).

Remove from oven and cool in the pan for about 20  minutes, then turn out onto a serving tray (or just leave it in the pan!!)

I frost mine with sweetened whipped cream that I stirred a little coconut into.

What could be easier and it is VERY tasty!!

Friday, April 19, 2013

Super Easy Velveeta Mac & Cheese

I know some food snobs will turn their nose up at a recipe using Velveeta cheese and that's OK, I don't use it very often either. However, Velveeta DOES make the creamiest macaroni and cheese, you have to admit it!!

A few days ago, Julie, over at Better than Burgers, posted a recipe she called KFC Mock Mac & Cheese. While I've never tried KFC mac & cheese, the recipe looked great. I made a couple of very minor changes to her recipe (and renamed it, lol). 

We loved it (and it couldn't be easier!!)


My recipe "tweaks" are in BLUE

Boil 2 cups of elbow macaroni for about 7-10 minutes (see note)
8 ounces of Velveeta cheese (see note)
1 cup shredded cheddar (I used sharp)
1/2 cup milk (I used 3/4 cup milk)
1/2 teaspoon salt  (I left this out)
1/2 teaspoon dry mustard powder  (my tweak)

Julie's recipe called for making the sauce in a pan, but I did it this way:

When the macaroni is almost done, put the Velveeta (cubed)+ the shredded cheddar + the milk and mustard powder in a microwave safe bowl. Microwave it on high for 1 minute, remove and stir.  Microwave it for one more minute and stir till smooth.

All microwaves are different, so watch yours for the final 30 seconds as to not over cook. The sauce will be very smooth.

Drain the cooked macaroni and stir into the sauce...that's all there is to it!! If you like "Velveeta Shells and Cheese" out of the box (the one with the foil pouch of cheese sauce) you will love this recipe.
NOTE: This recipe calls for 8 ounces of Velveeta cheese, fortunately, the Velveeta foil wrapper is marked in one ounce sections.
NOTE: Most elbow macaroni is boiled for about 7-8 minutes, but when I make macaroni and cheese, I like to boil the noodles an extra minute or so. It's just a personal preference.

Tuesday, April 16, 2013

Not a Cookbook -- Eat a Cicada

The Smithsonian has an idea for facing the coming cicada invasion.

A deep fryer and hot sauce.

Read about it here.


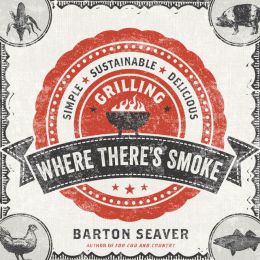
Where There's Smoke


D.C. chef  and sustainability advocate, Barton Seaver has published a grilling book entitled, Where There's Smoke. He brings his usual take on sustainability and applies it to everyone's favorite summer past time -- the barbecue. While most barbecue books concentrate on giant slabs of meat Seaver applies his sustainability ethics to what he puts on the grill. He includes a lot of vegetables and a lot of fresh seafood. Seaver is a firm believer in barbecuing with wood -- he loves the smoke. He believes in cutting his own wood.

He offered up one piece of advice that is different from many a barbecue book. He opts one the side of not soaking the wood before you put on the fire. After doing several studies where he soaked the wood, then cut through it to test the water absorption, he found that the soaking didn't actually get moisture into the wood and was probably more trouble than it was worth.
There are great sauces, sides, and desserts all infused with the power of smoke. This grilled broccoli rabe should be on every summer menu.
Grilled Broccoli Rabe with Walnut Anchovy Dressing and Egg
1 bunch broccoli rabe
Kosher salt
2 tablespoons extra virgin olive oil
One 2-ounce can oil- packed anchovies
1/4 cup walnuts, chopped
Juice of 1 lemon
2 eggs, hard-boiled and peeled, yolks remove for another use
Trim off and discard about 1/2 inch from the stem end of the broccoli rabe. Bring a large pot of generously salted water to a boil. Add the broccoli rabe and cook for 7 minutes, then drain it and lay the pieces on a baking sheet to cool to room temperature. Drizzle with 1 tablespoon of olive oil.
Heat the anchovies and their oil with the remaining 1 tablespoon olive oil in a small sauté pan over medium heat. Gently mash them into the oil with a spatula, then add the walnuts. Cook until the anchovies have melted into the oil and the walnuts are lightly toasted, about five minutes. Add the lemon juice and bring to a boil. Remove from heat and reserve.
Grill the broccoli rabe over the coals of the medium fire until it begins to char, 5 to 8 minutes. Do not turn or otherwise move the rabe until done.
Transfer the broccoli rabe to a platter and toss with dressing. Grate the egg whites onto the broccoli rabe with a box grader or by pushing them through the holes of the colander. Serve hot off the grill or at room temperature.
If you are looking for a great new addition to your summer cookbook list, Where There's Smoke is a must have.

Thursday, April 11, 2013

A Time To Cook


We have always loved Lee Bailey and have long lamented his passing.  At a time when "Southern" seems all the rage, one just needs to look back at Bailey's lovely collection of books to find the deep roots of the South.  Recently, however, we have found someone that just may be a likely successor to Bailey's easy style and Southern charm in the person of James Farmer III.

His new book is a cookbook, A Time To Cook.  In a market swamped with cookbooks claiming to be authentic Southern cookbooks, Farmer's roots reach deep in the red clay of the South.   We were delighted over at Lucindaville, to find the Church had elected a Southern pope since he chose Francis I as his name.  Jame Farmer can spot Francis I at a hundred paces.  He knows that cornbread cannot be made without an iron skillet.  And he tells a wonderful story about his grandparents having a contest to see who made the best cornbread using almost identical ingredients.   It is a wounder of cornbread that given the exact same ingredients, no two cornbreads would be alike.  A Southerner knows these things.

Every recipe has a story behind it.  Every woman that ever offered up a recipe is graciously thanked and given full credit, even if Farmer has tweaked them a bit.  We love our collards here, but we tend to like cooked down for several hours.   As a raw coleslaw ingredient?  Why not.

Collard Green Coleslaw

A small bunch (8-10 leaves without ribs) or ½ bag (8 oz.) washed and cut collard greens
½ medium head green cabbage
2 green onions
½ bunch flat-leaf parsley
2 tablespoons sugar
2 tablespoons apple cider vinegar
Mayonnaise
Salt
Freshly ground black pepper


In a food processor, process collard greens, cabbage, onions and parsley in batches until finely chopped, being careful not to over process.  Move each batch to a large bowl.

Dissolve sugar in vinegar in the microwave. Add  the greens and toss to mix well.

Add mayonnaise to suite your taste, and mix and moisten.  Season to taste with salt and pepper. 

When browsing his websites, we found this picture.  We have a similar flat whisk.


It  is a cherished possession.   My great-aunt Ruth used it to whip cream.  It was one of the most effective tools in the kitchen and seeing this bowl of whipped cream brought back memories from our Alabama porch.  You, too, can follow James Farmer III at his website

This boy can cook.  He can also garden, mix drinks and make lovely wreaths.   He is one to watch.  We are already waiting for the next cookbook!

Tuesday, April 9, 2013

BEST PUMPKIN BARS EVER !!! (Plus)

I've made pumpkin desserts for many more years than I care to count: pumpkin bread, pumpkin cake, pumpkin muffins, pumpkin pie, pumpkin bars, etc., etc., but today's recipe for super moist pumpkin bars is BY FAR THE BEST pumpkin recipe I've EVER tried !!!

They are light as air; they taste like pumpkin pie and they are SUPER, SUPER moist; they are totally addicting!! Since this recipe makes a large 10" x 15" pan, they would be excellent for a potluck, bake sale or weekend crowd. However if you are like us, and a 10" x 15" is just too much, check out the mini-version of this recipe at the bottom of this post.


4 large eggs
1 2/3 cup granulated sugar
1 cup vegetable oil
15 ounce can of pumpkin puree(see note)
2 cups all purpose flour
2 teaspoons baking powder
1 teaspoon baking soda
2 teaspoons ground cinnamon
1/2 teaspoon ground ginger
1/4 teaspoon ground cloves
1 teaspoon salt

This is super easy to make, just put the eggs, sugar, oil, pumpkin and spices in a large bow and mix with electric mixer until it gets nice and light (just takes about 30 seconds, but it is an important step).

Next add everything else, and mix until it is well combine, but don't over mix. I do this step with a  hand whisk.

Spread it into a lightly greased 10"x15" jellyroll pan and bake at 350°F for 25-30 minutes or until it springs back when lightly pressed. Cool completely before frosting.

FROSTING
8 ounces of cream cheese (room temperature)
1 cup butter (room temperature)
2 teaspoon vanilla extract
4 cups powdered sugar

Cream the cheese and butter together, add the sugar and vanilla and beat until smooth. Spread evenly on cooled bars. If frosting seems too thick, add milk (1 tablespoon at a time) until you get the consistency you like.

Here's the Mini-recipe:

A 10"x15" pan is just way to big for us empty-nesters, so here is a reduced size that fits perfectly in an 8"x4" loaf pan. I remove it from the loaf pan, frost it and then slice it (I get about eight 4" x 2" pumpkin bars out of this recipe).


1 egg
1/3 + 1 tablespoon + 1 teaspoon sugar
1/4 cup vegetable oil
1/2 cup pumpkin puree
1/2 teaspoon ground cinnamon
1/8 teaspoon ground ginger
pinch of ground cloves
1/4 teaspoon salt
1/2 cup flour
1/2  teaspoon baking powder
1/4  teaspoon baking soda

Follow same directions as above except use an 8"x4" loaf pan. I lined the bottom with parchment so I could just lift the bars out of the pan after cooking (for easy slicing). Bake at 350 for 25-30 minutes (my electric oven takes 30 minutes). Let cool completely then slice into bars.

FROSTING
I used half of the above frosting recipe because we like a lot of frosting. 

NOTE: Make sure you use plain old pumpkin puree, not the kind of canned pumpkin that already has spices in it. If you want to use the kind with the spices already in it, just reduce the spices in the recipe.

Not a Cookbook -- Requiescat in Pace


In the past week obituary writers have been working overtime.  Iron Lady and Mouseketeer, Movie Critic and Educator, even the son of a preacherman.   But here at Cookbook Of The Day, we are deeply saddened at the passing of Peter Workman.   Workman may not be a household name, but in our household, Workman was a giant.  Every bookshelf in our vast collection contains a title that Peter Workman laid hands on.   Ask anyone who worked for him -- he was a hands-on guy.


He published books about preppies and cats and what to expect when you were expecting and he published some of the most stunning cookbooks of all time: The French Laundry, The Silver Palate, and Hot,Sour, Salty, Sweet, to name just a few.

Peter Workman was a gentleman and a scholar and he will be missed.


New York Time Obituary.

Remembering Workman in Eater.

Monday, April 8, 2013

Home Made Summer


It has been colder in April than it was in December.   I have had it with winter and if the weather will not cooperate, then my cookbook selections will!!

Home Made Summer by Yvette van Boven is the eagerly anticipated companion to her book Home Made Winter, which followed the ever popular Home Made. All of van Boven's books have that "nextdoorneighbor"  feel to them and perhaps that is why they are so popular.  She makes you feel that you can do exactly what she does.   And, of course, you want to divide your time between Paris and Amsterdam, cooking and working with your  husband, the photographer.

There is a lot of "lifestyle" tucked into these cookbooks, but hey, we love a good lifestyle.   (Currently, I am freezing and dressed like the unibomber and not a single publisher is interested in my cookbook on how to cook great food while freezing and dressing like the unibomber, but I digress...)

My problem with this book is from a publisher's standpoint.  They perused the photos looking for a bright and sunny summer photo that was generic enough to say summer without linking the book to a particular genre.  But really, every third cookbook published has a "recipe" for preserved lemons.  Salt lemons ant throw them in a jar! Really?  Am I wrong?  Well, I just got in a new "grilling" cookbook and checked the index -- sure enough a "recipe" for preserved lemon.  Again, lemons, salt, jar.

I am complaining about this because there are great recipes that you probably never thought of that would have been a much better showcase for this book.   Like this one.


Negroni Fig Pops

½ cup plus 2 tablespoons (150 ml) red vermouth
2 ½ tablespoons (40 ml) gin
½ cup (125 ml) freshly squeezed orange juice
3 fresh figs
1/3 cup (75 ml) golden syrup or clover honey

1. Put everything in a blender and blend until completely smooth. Pour through a sieve into a bowl with a spout and then pour into 4 to 6 ice pop molds.
2. Place in the freezer and push wooden sticks in after 2 hours. Freeze for at least another 4 hours, but ideally for 1 day.
4. Run the ice pops under hot running water for 3 seconds to unmold them. 

 Yes, not a summer goes by that we don't make boozy ice pops, but the figs are a great touch and I haven't had a cookbook cross my desk this year that had a recipe for Negroni Fig Pops.

The Weather Channel says that sometime this week, the temperature will hit 80, followed by huge rains and a plummeting thermometer!   We are making ice pops so we will be ready!

Saturday, April 6, 2013

AVOCADO EGG SALAD

This quick and HEALTHY change to mayo-laden egg salad was a huge success; we didn't miss the mayo at all!! It was light and delicious and packed with flavor. I can see countless possibilities with this little recipe (I'm already planning to add a few green onions? hot sauce?).

Personally, I enjoyed this salad just wrapped in a big leaf of lettuce, but Picky-Picky husband went for the traditional sandwich.
4 hard boiled eggs, peeled and chopped
1 large ripe avocado
2 stalks celery chopped finely
1/3 cup diced tomato flesh (see note)
2 tablespoons prepared yellow mustard (see note)
salt to taste (I just added a pinch)
pepper to taste (see note)

NOTE: NO MAYONNAISE!!

Cut the avocado in half, remove the pit and mash the flesh (I mashed about 3/4 of the flesh into a smooth paste and left 1/4 of the flesh in little chunks.

Stir the prepared yellow mustard, salt and pepper into the mashed avocado,  mix well.

Add the chopped eggs, celery and tomato and stir gently until well mixed.  That's it!!


NOTE: I wasn't sure how to explain "tomato flesh"; it just means leave out the juicy-seedy part of the tomato.

NOTE: Two tablespoons of yellow mustard is going to seem like a lot, but the final product does NOT taste overly mustardy, trust me. I just used plain old yellow hot dog mustard.

NOTE: I cook with coarsely ground black pepper, so I used a scant
half teaspoon. If you use finely ground pepper (it measures differently) use less.

NOTE: I put this salad in the fridge for several hours without any avocado darkening problems because I laid plastic wrap right on the surface of the salad and pressed down a little to force out all of the air. I'm not sure if it would turn dark overnight because it never lasts that long at our house.