Recipes from an Edwardian Country House

Recipes from an Edwardian Country House is a book that was repackaged from an earlier book. Frankly, I hate it when publishers do this sort of thing, as I often have the first book and then end up with another copy of the same book .

Seasonal Recipes From The Garden

For a long time my cable provider didn't provide a PBS station. It seemed weird, no PBS, but I learned to live it. After changing providers, I suddenly had PBS again.

Favorite Recipes of Famous Men

We are suckers for collections of recipes by "famous" folk. So naturally, Favorite Recipes of Famous Men a 1949 cookbook collection by Roy Ald is a great one.

Spoonbread and Strawberry Wine

There is not a single member of Norma Jean and Carole Darden's family that you want to hang out with. While most of them are gone now, they live on in this delightful cookbook and memoir.

Recipes from an Edwardian Country House

Recipes from an Edwardian Country House is a book that was repackaged from an earlier book. Frankly, I hate it when publishers do this sort of thing, as I often have

Monday, July 30, 2012

PERFECT FRENCH FRIES

We don't eat homemade french fries very often because they don't turn out very well. I've tried many potato varieties; I've tried various oils and temperatures; I've tried double frying them (what a hassle that was!) and I've tried baking them... they all come out of the oil LOOKING great but turn limp and greasy in a matter of minutes.

Then, recently, I came across this very simple recipe.  Assuming this technique was just too easy to produce great results, I didn't even mention the recipe "experiment" before I served them.
After about the third french fry, picky-picky hubby offered this unsolicited critique: "these fries are REALLY good"... I knew I had a winner.  I will definitely be using this super easy method the next time we decide to treat ourselves to some fries.

2 pounds of Russet potatoes (make sure they are Russet's)
2 tablespoons corn starch
peanut oil   (peanut oil works the best)
kosher salt

Slice the potatoes into shoestring size pieces, trying to make them as even as possible. Rinse the cut potatoes thoroughly and put them in a big bowl of plain cold water in the fridge until dinner time (at least an hour, but overnight is even better).

Take the potatoes out of the cold water and lay them on an absorbent towel, blotting most of the water off. Coat the potatoes lightly with the cornstarch and shake off the excess.  Let them air dry while the peanut oil heats up to 375 degrees.

A word about the oil:  You will get the best french fries using peanut oil; it has a high scorch level and tastes great.  You can also use regular vegetable oil, but avoid canola oil. Canola oil tastes a little "off" if you bring it up to 375 degrees. I was surprised what a difference peanut oil makes.

When the oil reaches 375, put a big handful of the coated potatoes in the oil and stir to separate them.  After they've fried for a minute or so, stir them again to make sure they aren't sticking together (don't overcrowd your pan).

When the potatoes are light golden brown, take them out of the oil and put them on paper towels to wick away some of the oil. Sprinkle generously with kosher salt (it tastes so much better than regular table salt on the french fries).

That's it!! No more limp, greasy french fries (and NO more double frying!!). Who knew that Russet potatoes, a little soak time, a little corn starch and some peanut oil would make such a great french fry?!?!

NOTE ABOUT CUTTING THE POTATOES: Peel (or wash) the potatoes and cut the sides of the potatoes off (making sort of a rectangle). This will give your potato flat sides to rest on while you slice through the potato.  Stack the potato "slabs" and cut into shoestring size potatoes.
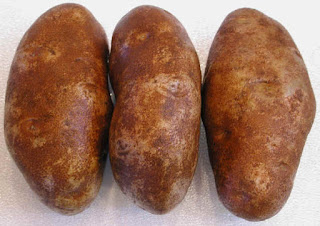
Russet's are those big baking potatoes.

Saturday, July 28, 2012

SHRIMP FRIED RICE

This recipe is light, flavorful, versatile and most of it can be made ahead and just heated together at meal time. It is one of our favorite's (summer AND winter) and double or tripled, it is great for a crowd!! 

 
3 cups of cold COOKED rice (day old rice is best)
5 slices of bacon (save 2 tablespoons bacon fat )
1/2 cup chopped sweet onion
1/4 cup sliced green onion tops
1 pound of  large shrimp
2 eggs beaten
1/2 teaspoon salt
1/4 teaspoon black pepper
dry crushed red pepper flakes to taste
2 tablespoons soy sauce
1/4 teaspoon sesame oil
Sliced cherry tomatoes for decoration
Any veggies you want to add (cooked and chopped)


Spray your largest frying pan with vegetable spray and heat to medium high. Beat 2 eggs and pour them into the pan, tilting the pan so the eggs spread out nice and thin. When the eggs are starting to "set", sprinkle lightly with a few crushed red pepper flakes. Flip the eggs over and remove from heat. If the eggs don't flip over in one piece, that's ok, just keep the pieces as large and thin as you can. Remove from pan.

When the eggs are cool enough to handle, roll them up and slice thinly (to get thin strips of egg). This sounds like a hassle, but it is an important part of the dish; set aside.


Fry 5 slices of bacon until crispy, remove and drain on paper towels set aside (reserve some bacon fat).

Put 2 tablespoons of the reserved bacon fat in a wok or large frying pan, add 1/2 cup chopped sweet onion and saute until tender; add 3 cups of COLD cooked rice, the crumbled bacon, 1/4 cup sliced green onion, 1/2 teaspoon salt, 1/4 teaspoon black pepper and any other chopped (cooked) vegetables you want to include; gently mix over medium heat.

Add 2 tablespoons soy sauce, 1/4 teaspoon sesame oil and one pound of COOKED shrimp (see note). Gently toss, and heat through; gently stir in egg strips just before serving. Decorate with sliced cherry tomatoes.


NOTE: If you are using precooked shrimp, just stir them in at the end of the recipe.

NOTE: If you are using raw shrimp (which I highly recommend),
CLICK HERE for my easy cooking method.

NOTE: If you are using  frozen raw shrimp, make sure they are completely thawed and drained and patted dry before you cook them (or they will boil as they defrost and get rubbery).


NOTE: It is important that the rice used in this recipe be made ahead of time and chilled in the fridge. It is a great use for leftover rice. 

NOTE: You will not be happy with the outcome of this recipe  if you use freshly made rice.

Saturday, July 21, 2012

PAUL PRUDHOMME SEASONING MIX CLONE

I've thought about trying commercial dry rubs for a long time, but I have trouble spending several dollars on them since the ingredient list tells me I have those same spices at home!! So...... I've been experimenting with my own spice rack (with picky-picky husband's timid pallet in mind of course). He is (has always been) a meat and potatoes...salt and pepper...mild barbecue sauce kind of guy, so I've had to introduce these dry spice rubs "subtly" (snicker).

Today's post was a big hit. I found it during one of my "2 AM can't sleep" Internet sessions and I failed to write down it's source, I apologize. The spice combo is just right for our taste..... not too spicy, but VERY flavorful and it goes well with just about any meat, even seafood.


PAUL PRUDHOMME (style) SEASONING MIX

1 tablespoon salt
1 tablespoon paprika
1½ teaspoons garlic powder
1 teaspoon onion powder
1 teaspoon white pepper
1 teaspoon DRY mustard powder
½ teaspoon ground cumin
½ teaspoon ground turmeric
¼ teaspoon ground nutmeg

Mix everything (makes about 1/4 cup) and rub, liberally, onto raw meat about an hour before grilling.

Tuesday, July 17, 2012

The French Country Table


 Face it.  We will read any French cookbook out there.  It is a sickness. An addiction.  We love it and that is that.  By now, the biggest differentiation between French cookbooks is the photographs. 

Ryland, Peters and Small, always a favorite publisher for cookbooks, publish the French Country Table.   They understand the value of photos, good recipes and basic bookbinding.  The thick muted paper has an old-fashioned feel and is the perfect vehicle for a country cookbook. 

Writer Laura Washburn has taken many of the familiar French dishes and given them a bit of twist.   There is a roasted chicken, but with guinea fowl.  There is a gratin with macaroni (yes, it is just a macaroni and cheese).  The clafoutis is rhubarb instead of cherries.

The pictures are lovely.  It is no wonder that Martin Brigdale has won numerous awards on three continents for his food photography.  The photos show the food at its best!  


 Your carrots should look like the above left carrots, especially if you procured them from one the vegetable vendors pictured!
Carrots with cream and herbs.

2 lbs. mini carrots, trimmed, of medium carrots
3 tablespoons unsalted butter
a sprig of thyme
2 tablespoons crème fraise or sour cream
several sprig of chervil, snipped
a small bunch of chives, snipped
fine sea salt

If using large carrots, cut them diagonally into 2-inch slices.  Put in a large saucepan (the carrots should fit in a single layer for even cooking.) Add the butter and set over low heat.  Cook for three minutes, until the butter has melted and coated the carrots.  Half fill the saucepan with water, then add a pinch of salt and the thyme.  Cover and cook for 10 – 20 minutes, until the water is almost completely evaporated.
Stir in the crème fraise and add salt to taste.  Sprinkle the chervil and chives over the top, mix well and serve.

If you have ever passed one of those sad bags of “baby” carrots in vegetable section, now you have a great idea of what to do with them.  Whip up these carrots in cream and you, too, can transport yourself to the French countryside.


Monday, July 16, 2012

The Mistress Cook


In 1867 Mrs. Beeton wrote the following:

“Men are now so well served out of doors – at clubs, hotels and restaurants – that, to compete with the attraction of these places, a mistress must be thoroughly acquainted with the theory and practice of cookery, as well as all the other arts of making and keeping a comfortable home.”

Peter Gray’s “mistress” is the 1950’s mistress of the house and not of merely the bedroom.  Peter Gray was indeed a “mistress” of all trades.  He became enamored of the culinary when he was a boy spending time in Paris.  He would eventually become a professor of Biological Science at the University of Pittsburgh.   Along the way he was a printer, bookbinder, gem cutter, fisherman and photographer.

In The Mistress Cook, Gray brought together a thousand recipes from twelve countries over six centuries.  The recipes are at once simple and familiar as well as exotic and complex.    There is an extended chapter at the end of the book devoted to spices and spice mixes.  There is a chapter full of sauces and stocks devoted to major and minor sauces. 

It is a book written in the 1950’s, so there are no lists of exact ingredients.  There are two pages of instruction for puff pastry.  According to Gray, the best way to learn to make puff pastry is the to do it over and over.  One does not become tennis pro by reading about tennis.  Go ahead and buy puff pastry.

This book is an excellent overview of the history of cooking and cooking techniques.  It is indeed what Gray set out to do, provide a vast collection of recipes over continents and time periods.  One would be best served to find a recipe and search out a modern recipe.

Here is a recipe for a favorite Southern fare – collards.

Collards

I am told by an elderly Southern gentleman of my acquaintance, that this leather-leaved survivor of the past can be rendered edible by boiling it for a week with fat pork.
Seriously, collards only need about 8 hours to cook!

Here is another recipe featuring my favorite cauliflower with the regal name, Crème du Barry. 


Crème du Barry

Cook a small cauliflower in slated water until it can conveniently be divided into florets.  Mix the florets with an equal volume of grated potatoes and a quarter of their volume of grated onion.  Put this mixture in a pan, cover it liberally with milk, and simmer until the vegetables are sludged.  Put it through a sieve or food mill.

Don’t you just love a recipe that has “sludged” vegetables?   Though not that appetizing, sludged is the perfect description for what these vegetables will look like when simmered.  There is not a cookbook publisher out there who would let an author describe veggies as "sludged" and yet it is spot on.


Thursday, July 12, 2012

The Breakfast Book


Who knows what sends us down the path to obsession?   I do know that one of the first cookbooks I bought with my own money was Marion Cunningham's The Breakfast Book.  I have vivid memories of the book because it is one of those "go to" books that I consult often.  I cannot help thinking of that book today upon hearing the new that Cunningham died.  

Marion Cunningham  New York Times obituary
 The best tribute I have ever read of Marion Cunningham came from her friend, David Lebovitz.  In 2006 he easily summed up what made her special.


Readers of Cookbook Of The Day know of our abiding love the egg.  One of my favorite egg dishes came from The Breakfast Book.  It is Marion Cunningham's Featherbed Eggs.  I always referred to them as "feathered" eggs.   This may well be the greatest recipe that any cook can have in their cooking repertoire.  First, it is incredibility easy.  Any man, woman, or child can assemble it with little effort.  Secondly, it can be customized to make it your own by adding virtually anything under the sun.  My particular favorite is sausage!  Finally, it is a "make ahead" dish and perfect for company.  


When you have guests staying over and you are dreading being the breakfast short order cook, simply whip this up in the final minutes of dinner prep.  Now is the perfect time to add your own touches.  Sausage, as I said before, steamed cauliflower, apple slices, use your imagination.   Cover the pan and set it in the refrigerator.   While the coffee is brewing, set your dish in a cold oven and in less than an hour you will have a glorious breakfast with little fuss and big rewards.

Featherbed  Eggs

6 slices white bread
Salt and pepper to taste
1 1/2 cups grated sharp cheddar, Gouda, provolone or Montery Jack cheese, or a combination
1 1/2 cups milk
6 eggs

Butter the sides and bottom of a 9 x 13-inch baking dish. Arrange the slices of bread in the dish, trimming the edges, if necessary. Sprinkle the bread with a little salt and pepper. Sprinkle the grated cheese evenly over the bread.

Combine the milk and eggs in a bowl and briskly stir until the mixture is all one color and completely blended. Pour the milk mixture over the bread and cheese. Cover and refrigerate for at least 6 hours, or overnight.

Baking the Featherbed Eggs: Because the dish will be chilled when you are ready to bake it, start it in a cold oven and turn the thermostat to 350 degrees. Bake for 1 hour, or until the bread custard is puffy and lightly golden. Check at 45 minutes, in case your oven is a little hotter. 


My favorite picture of Marion Cunningham was taken in 1987.  She is seated across from another cooking legend, Edna Lewis.  Oh to have been a fly on the wall, or the garden chair.

Tuesday, July 10, 2012

Cookbook Redux


SOME HOUSEKEEPING


From time to time we are asked for additional recipes from cookbooks and generally we are happy to oblige.  We welcome all questions, though we have trouble sometimes with how to respond efficiently to comments, so here is an attempt.


Someone asked for an additional recipe from Southwest Tastes.


Can you please post the bbq potato salad recipe out of that book?  There is only one potato salad recipe, but it does have barbecue sauce, so here it is from The Salt Lick in Driftwood, Texas. 


Potato Salad

5 large Idaho baking potatoes
Salt and pepper to taste
1 teaspoon celery seed
1 large onion, peeled and diced
1/2 cup juice drained from dill pickles
1/3 cup barbecue sauce
1/3 cup vinaigrette salad dressing
1/2 to 1 cup mayonnaise, or to taste

    The day before serving, scrub the potatoes and boil them in salted water until tender but still slightly firm when pierced with a knife point;they should not be mushy.  Plunge them into ice water, and when cool enough to handle, peel them and cut them into 3/4 inch dice.
     Season the potatoes with salt, pepper, and celery seed.  Marinate the onions in the pickle juice for a few hours, or overnight in the refrigerator.  To serve, drain the juice and add the onion s to the potatoes.  Add the barbecue sauce and salad dressing, tossing to coat evenly.  Place back in the refrigerator at least one hour before serving, and just before serving, add the mayonnaise.  Adjust the seasoning and serve.
Enjoy! Send us photos of the finished recipe.


 A couple of people wanted to know how to reach us on e-mail:  lucindaville@gmail.com


Thanks to  Brocante Home for our housekeeping picture!

EASY BUTTERSCOTCH CANDY BARS

This delicious recipe (posted by Ellen b. over at MGCC) was originally a cookie bar; but you know me, I can't leave a recipe alone, so I doubled the topping ingredients and the end result was almost like a candy bar. I served them at a BBQ, recently, and they were inhaled by kids and adults alike. They are SO easy to make, but a warning here... they are totally addicting!!

 
COOKIE BASE (original version)
1½ cups all purpose flour
¼ teaspoon salt
½ cup butter (room temperature)
¾ cup brown sugar

Mix the flour, salt and brown sugar, then cut the room temperature butter into the mixture. To do this, I used my stand mixer with a wire whisk on medium high and it gave me fine crumbs like this, which is perfect. Put the crumbs into a 9 x 13 baking dish that has been sprayed with vegetable spray.
Level the crumbs out with your fingers and then pat them down evenly. I used the bottom of a smooth  measuring cup to tamp down the crumbs, which produced a nice flat layer like this:
Bake in a preheated 350F oven for 15 minutes.

While the cookie base is baking, mix the following ingredients in a microwave safe bowl:

BUTTERSCOTCH TOPPING (my version)
12 ounces of butterscotch baking chips
½ cup light corn syrup (I use  Karo syrup)
4 tablespoons butter
2 tablespoons water
¼ teaspoon salt

Melt the above ingredients in the microwave, stirring every 30 seconds (my microwave took about 75 seconds). When the mixture is completely smooth, add two cups of coarsely chopped (and toasted) pecans.

After the cookie base has baked for 15 minutes, remove from the oven and spread the butterscotch-pecan mixture over the top and put back in the oven for another 8 minutes.

Cool completely before slicing.
Store in lightly covered cookie jar.

Thank you for sharing the original recipe Ellen b.

Monday, July 9, 2012

Not A Cookbook -- A DERECHO

We are fine...no life lost.   Here is the info by the numbers:

ONE

bad ass storm 

FOUR

days without water, phones, electricity

SIX

large trees down

ONE HUNDRED FOUR

degree temperature at its max

FOUR HUNDRED

pounds of food lost


What a mess!   We are still in recovery mode, but we will be back up to speed, soon.

Sunday, July 8, 2012

EASIEST BREAD STICKS EVER !!

If you have a stand mixer, these bread sticks practically make themselves!! Just throw everything in the stand mixer at once, and let it mix for 3 minutes, let it raise for an hour, shape them then let them raise again and bake... that's it!!


In the bowl of a stand mixer, put

2/3 cup warm milk
2 tablespoons sugar
2 teaspoons of yeast

Stir it up just a little (with a spoon), then add

1 tablespoon + 2 teaspoons butter (room temperature)
2 cups flour
1 teaspoon salt

Put your paddle blade on, and mix for three minutes on medium low speed, it should look like this (the walls of the bowl should be clean)

Take the dough out of the bowl and spray the bowl with some vegetable spray and put the dough back in. Cover with plastic wrap and then a dish towel, and let it raise for an hour. It won't get huge because there is only 2 cups of flour, but it should be nice and puffy


Divide the dough into 8 pieces and roll them out to (about) the diameter of your thumb.  Place them on a parchment lined cookie sheet (or just a lightly greased sheet) a few inches apart and lightly spritz them with vegetable spray. Cover them with plastic wrap and gently lay a THIN kitchen towel over the plastic wrap.

Let them raise for about an hour, then remove the plastic wrap and bake them in a pre-heated 375 oven for 10 to 15 minutes or until they are golden brown, then remove them and brush them with butter. Some times I brush them with butter and then roll them in Parmesan....Mmmmmm. Serve hot!!

 
NOTE: I'm sure this recipe would work very well in a bread machine as well.

Wednesday, July 4, 2012

SALAD DRESSING CLONE RECIPES

It is BBQ season, that is for sure and what goes better with grilled "anything", than a fresh green salad?!?  I've posted these salad dressings before, however, I've tweaked them again and this time I think they are perfect, well at least that is what picky-picky husband says.

Not only are they delicious, but they certainly save a lot of money and I  feel good knowing exactly what is in my salad dressing!!

HIDDEN VALLEY RANCH CLONE

1 cup mayonnaise (low cal OK)
1 cup buttermilk (don't substitute)
2 tablespoons chopped parsley (or 2 tsp. dried)
3/4 teaspoon black pepper
3/4 teaspoon salt
1/2 teaspoon garlic powder (not garlic salt)
1/2 teaspoon onion powder (not onion salt)
2 large pinches dried thyme

Whisk together and chill overnight before using.

NOTE: Don't use this dressing right after you make it; it will NOT taste like ranch dressing. Something magical happens to it after it sits overnight...trust me!!

*****
We like Light House brand Thousand Island salad dressing (in the refrigerated veggie section) but the price has increased to nearly $4.50 for a small jar, which is crazy.  The following recipe  is VERY close to the original, I hope you like it... picky-picky husband loves it.

LIGHT HOUSE THOUSAND ISLAND  CLONE
3/4 cup mayonnaise (low cal is OK)
1/4 cup ketchup
2 tablespoons sweet pickle relish
2 tablespoons finely minced celery
1/8 teaspoon salt
1/8 teaspoon black pepper
1 teaspoon fresh lemon juice
Whisk everything together and refrigerate at least a couple of hours before using.

*****


This Catalina salad dressing is delicious, our grand kids love it. I can't believe how easy it is to make.

CATALINA SALAD DRESSING CLONE

1 cup vegetable oil (I used canola oil)
2/3 cup ketchup
1/2 cup vinegar (I used red wine vinegar)
1/2 teaspoon onion powder (not onion salt)
1/2 teaspoon dry mustard powder
1/2 teaspoon celery seed
1/2 teaspoon chili powder
big pinch of paprika (not the spicy kind)
2 teaspoons salt
1/2 cup sugar
Place all ingredients in a blender (I used an immersion blender) and mix on high speed (salad dressing will really thicken up as you process it).

NOTE: Catalina needs a good whisk before using (if it has been in the fridge for a few days).

NOTE: All three of these salad dressings last an easy 10 days (or more) in the fridge.

Monday, July 2, 2012

BRIGHT CITRUS SALAD

In the heat of summer, this great salad is a nutritious combination of crunch (from the broccoli and sunflower seeds) and sweetness (from the oranges and raisins).  It gets its brightness from the lemon juice, green onions and red bell pepper and finally the addition of the black beans give you that wonderful "full feeling" that you do not get with some light meals. This is a GREAT side dish!! Measurements given here are approximate (except for the dressing). YOU decide how much of each ingredient you would like in your salad. The amounts given here are catered to MY taste buds. 


3 small heads of broccoli (broken into small pieces)
1 red bell pepper (diced finely)
1 cup raisins
2 oranges (peeled and sliced thickly)
15 ounce can of black beans (rinsed and drained)
1/2 cup  toasted sunflower seeds
1/2 cup sliced green onion tops

Dressing:
1/2 cup light mayonnaise
2 tablespoons fresh lemon juice
1 tablespoons sugar
1/4 teaspoon black pepper


Wash (and shake dry) the broccoli. Remove as much of the stalk and stems as you can so you can break the florets into bite size pieces. Add diced red bell pepper, raisins, oranges, black beans, sunflower seeds and green onions.

Mix dressing ingredients with a whisk and pour dressing over the salad. Toss gently and serve immediately. NOTE: You may not need or want all of the dressing.


NOTE: Peel the oranges, removing as much of the white as you can, then slice the orange into thick slices; cut the thick slices into four wedges.

NOTE: Let your imagination go wild with this salad, you can add just about anything that strikes your fancy.