Recipes from an Edwardian Country House

Recipes from an Edwardian Country House is a book that was repackaged from an earlier book. Frankly, I hate it when publishers do this sort of thing, as I often have the first book and then end up with another copy of the same book .

Seasonal Recipes From The Garden

For a long time my cable provider didn't provide a PBS station. It seemed weird, no PBS, but I learned to live it. After changing providers, I suddenly had PBS again.

Favorite Recipes of Famous Men

We are suckers for collections of recipes by "famous" folk. So naturally, Favorite Recipes of Famous Men a 1949 cookbook collection by Roy Ald is a great one.

Spoonbread and Strawberry Wine

There is not a single member of Norma Jean and Carole Darden's family that you want to hang out with. While most of them are gone now, they live on in this delightful cookbook and memoir.

Recipes from an Edwardian Country House

Recipes from an Edwardian Country House is a book that was repackaged from an earlier book. Frankly, I hate it when publishers do this sort of thing, as I often have

Wednesday, May 15, 2013

EASY MINI CHEESECAKES

Picky-picky husband has decided he loves cheesecake. Not just any cheesecake (that's part of his picky-picky-ness), but he loves miniature cheesecakes. I think it is because he can just snag one out of the fridge without plate or utensils.

This recipe for mini-cheesecakes is extremely quick and easy and since you can use any flavor of jam, it is quite versatile. If you don't want to add the jam, just leave it out!!

CRUST
1 cup graham cracker crumbs
2 tablespoons sugar
3 tablespoons butter, melted

Mix these three items until everything is moist and crumbly.
Place paper cupcake liners in cupcake pan (recipe makes 24 miniature cheesecakes).  Place a scant tablespoon of the crumbs in the bottom of each paper liner and tamp down a little.

CHEESECAKE FILLING

(3) 8 ounce packages of cream cheese (room temperature)
3/4 cup sugar
2 teaspoons vanilla extract
3 eggs

Beat the softened cream cheese for 2 minutes; it should be very creamy. Add the sugar and vanilla and beat for about 30 seconds.

Add the eggs, one at a time, beating well (on low) in between each egg.

If you are going to use jam in these cheesecakes (it is completely optional), put a rounded tablespoon of cheesecake batter on top of each graham cracker crust. Swirl a little of your favorite jam over the batter, like this:

Top this with another heaping tablespoon of cheesecake filling and then put another swirl of jam on the top surface.

Bake at 325°F for 25-30 minutes (my electric oven takes 25 minutes).
Leave the baked cheesecakes in the pan and cool to room temperature. After they are at room temperature, put them in the fridge to chill for at least a couple hours before serving.

Tuesday, May 14, 2013

The Tammy Wynette Southern Cookbook


The death of George Jones made us troll our collection to find this gem, The Tammy Wynette Southern Cookbook.  Now Tammy penned this little cookbook after she and George had long split, but one simply can't think of George without a passing thought of Tammy.  

"As many of you know already, I was born on a sharecropper farm in Itawamba County,Mississippi.  We had no running water, no indoor plumbing, and no stove.  We cooked over an open fireplace with water drawn and handcarried from a nearby spring.... In the years that have passed since then, I've preformed on every continent, in hundreds of cities, and in nearly every state in the U.S. ...I've entertained in the White House numerous times, and before other heads of state, in addition to preforming in some of the most famous concert halls in the world.  Yet, despite all these honors, my roots are pure rural Mississippi."

While she admits to gathering many of her recipes from her grandmother, she is not adverse to a bit of 1950's kitchen helpers.  There are Ritz crackers, cake mix, tons of canned soup and even some canned asparagus.  A good third of the book is dedicated to dessert.  There are chocolate pies, chess pies and cobbler, with eggs if times are good and it plain ol' berries when they are not.   

There is not a lot of exposition to these recipes.  Either you have it or you don't.  This cake was passed on to her by some friends.  

Jell-O Cake

1 box cake mix (yellow or white)
3/4 cup Wesson oil
4 eggs
1 small box of Jell-O (any flavor)
3/4 cup milk

Bake at 350 degrees for 45 minutes in tube pan.


We believe that the ingredients should be thoroughly mixed before dumping into the tube pan.  And the tube pan should probably be oiled and lightly floured.   Simply close your eyes and think of the possibilities with all those Jell-o flavors.   Close your eyes and see Tammy waiting for George at the Pearly Gates, Jell-o Cake in hand.

Friday, May 10, 2013

CHOCOLATE MARSHMALLOW BROWNIE PIE

I've noticed a trend on my birthday (which is today); it seems I always treat myself to something  CHOCOLATE!! Today's birthday post is ULTRA-chocolate (and delicious).

It starts with a rich brownie layer that you top with miniature marshmallows while it is still piping hot out of the oven. Then it is topped with a rich chocolate glaze and sprinkled with lots of toasted sliced almonds. It was heavenly!!

 
BROWNIE LAYER
In a small bowl whisk the following ingredients together:

3/4 cup all purpose flour
1 cup sugar
1/4 cup unsweetened cocoa powder
1 teaspoon baking powder
1/4 teaspoon salt

In a different bowl, beat the following together:

1/2 cup butter melted
2 large eggs
2 teaspoons vanilla

Add the wet ingredients to the dry ingredients and mix until smooth.

Place batter in a greased 9" round pan (spring form pan works the best) and bake in a 350°F oven for 25-30 minutes or until toothpick tests clean (my electric oven took 25 minutes).

Remove from oven (and turn oven off). Top HOT cake with miniature marshmallows (I used about 4 large handfuls) and put it back in the hot oven for 2-3 minutes or until marshmallows have puffed up a little. Remove from oven.

FUDGE FROSTING

6 tablespoons melted butter
6 tablespoons BOILING water
6 tablespoons dry cocoa powder
2 cups powdered sugar
1 teaspoon vanilla extract

Whisk until smooth. Gently pour (evenly) over the warm marshmallows and then sprinkle with TOASTED sliced almonds (nuts optional). If you don't like nuts, colored sprinkles look festive too.

Let everything cool off a little, then put it in the fridge for about an hour to "set" the chocolate frosting. Bring the cake back to room temperature before serving.

NOTE: You can bake this in ANY greased 9" cake pan, but a two piece spring form pan will allow you to remove the cake a little easier. If you use a 2 piece pan, make sure you put a cookie sheet under the pan.
 

Monday, May 6, 2013

Mastering The Art of Southern Cooking


This weekend, Nathalie Dupree and Cynthia Graubart won the James Beard Award for American Cooking  with their behemoth Mastering The Art of Southern Cooking.  Not only is it a cookbook, but it makes a great DIY project.  Just add four rather sturdy  legs and you have a lovely martini table ( or should we say mint julep table?) to sit beside your settee.  It has been said that about 300 pages was cut from the manuscript which now stands at over 700 pages.

There are those that have taken offense with the "Mastering The Art" title, and while it might cause one to think of the legendary Julia Child, there are nearly a thousand books featuring those words in the title, so you need to get over it.  Dupree worked for two years when Graubart signed on to assist and then the pair worked another four years to bring the book to fruition. In the midst if the process they published  Southern Biscuits in 2011.  In researching Mastering The Art of Southern Cooking, they had already amassed 35 biscuit recipes!

Needless to say, there is not much of anything left out.  There are some things in the cookbook that don't really strike me as totally "Southern" like Yorkshire Pudding Popovers, but then there is Okra Pilau.  There are lots of grits, plenty of pork and enough desserts to send you into a coma.  When we wanted to pull out a recipe, we felt the same kind of overwhelmed that Dupree felt in the early stages of research.  What to do??  Well this is an old, new Southern favorite.

Mississippi Caviar

3 (16 ounce) cans black-eyed peas, drained
1/2 cup finely chopped green pepper
1/2 cup finely chopped red pepper
3/4 cup finely chopped hot peppers
3/4 cup finely chopped onion
1/4 cup drained, chopped pimento
1 garlic cloves, chopped
1/3 cup red wine vinegar
2/3 cup olive oil
1 tablespoon Dijon mustard
Salt
Hot sauce

In a large mixing bowl, combine peas, bell peppers, hot peppers, onion, pimento and garlic.
In a separate bowl, whisk together the vinegar, oil and mustard and pour over the bean mixture; mix well. Season to taste with salt and hot sauce. 

With a wooden spoon or potato masher, mash the bean mixture slightly. Refrigerate until ready to serve.
Drain the caviar well before serving.

 If you want to totally immerse someone in Southern cooking, this book is the best place to start.   Congratulations on the James Beard Award.

MINI BUTTERSCOTCH CHEESECAKES

Whether you are a small family or "empty nesters" like us, this scaled down recipe for mini-butterscotch cheesecakes is a handy one.

I started scaling down full sized dessert recipes because we got tired of eating the same dessert several nights in a row. This recipe (depending on how big you make them) will give you 5 or 6 cupcake sized cheesecakes.


Preheat oven to 325°F and line a cupcake pan with paper liners.

GRAHAM CRACKER CRUST:
3/4 cup graham cracker crumbs
2 tablespoons sugar
3 tablespoons melted butter
Mix crust ingredients and divide evenly between 5-6 paper liners (press crumbs down to make flat crust inside paper liners).

CHEESECAKE BATTER:
1/2 cup butterscotch baking chips
4 ounces regular cream cheese (room temperature)
2 tablespoons sugar
1 eggs slightly beaten (room temperature)
1 teaspoons all purpose flour
1/2 teaspoon vanilla extract
1/2 teaspoon rum extract (see note)

Melt butterscotch baking chips (I use my microwave) just until they are melted and smooth, don't overheat. Set aside to cool down a little.

Beat the cream cheese until it is very smooth (1 minute or so?). Beat in the melted (and cooled) butterscotch chips and sugar until well mixed. Add the egg, flour and extracts and beat until smooth, but don't over beat.

Pour the batter over the crust and fill paper liners about 80% full, or almost to the top. When these cheesecakes are done baking, they will look domed, but as they cool, they will lose that "dome".

Bake for 25-30 minutes (my electric oven takes 30 minutes). Of course it will depend on how much you fill up the paper liners and how hot your oven runs. Just bake them until they are set.

Cool in the pan for half hour or so, then put them (still in the pan) in the fridge to chill for a few hours. Remove paper liners before serving.

NOTE: If you don't have rum extract, just double the vanilla.


Thursday, May 2, 2013

EASY DRY RUB FOR GRILLING

It IS spring, right? Here in Alaska we aren't so sure, since today (May 2nd) it is snowing!! I have to stay positive and plan for future barbeque's though, so here is a QUICK and SUPER EASY dry rub to use the next time you grill outdoors.  It may look a little on the sweet side, but the final product is NOT overly sweet, it is perfect.


3/4 cup white sugar
3/4 cup brown sugar
1/4 cup salt
1 teaspoon onion powder (not onion salt)
1 tablespoon coarse ground pepper
pinch of cayenne pepper (or to taste)
2 tablespoons paprika

Mix well and keep in jar with a tight lid. To use, brush your pork or chicken lightly with vegetable oil and then rub this mixture onto the surface of the meat about 20 minutes before grilling. It couldn't be easier!!

Wednesday, May 1, 2013

Moro

 In recent years, Spanish food has been all the rage.  It is the other Mediterranean food. Hop a boat to North Africa and you get a whole new spin on Mediterranean.  While elBulli was the moon for molecular gastronaughts, Spaniards have been eating food for quite some time.  

So how does one find out how to cook, simple, delicious Spanish food.  Let's start with simple delicious Italian food.  The River Cafe in London is one of the world's best restaurants.  It offers up, simple, clean, seasonal Italian food.  It has also offered up a slew of fabulous cooks.   If you are a famous chef in London, there is a good chance you once worked at The River Cafe.

That was the case for Sam and Sam Clark.  One is Samantha and the other Samuel but which is which?  After working at The River Cafe and honeymooning in Morocco, the duo decided to open a cafe that would spotlight the flavors of the Mediterranean from a Spanish point of view and in the late 1990's they opened Moro.  It quickly became THE place to eat in London.  In 2001, Sam and Sam published their cookbook which was an instant hit.

Unlike Italian food which now has a stronghold in even the tiniest towns in America, Spanish cooking hasn't exactly permeated the country.  That means there are some spices and condiments that require a bit of shopping.  But once you find a supplier, you are golden.

At Moro they are very fond of harissa.  Harissa is one of those condiment used with the same ubiquitous flare that Americans use mayo.   Those this one is hot and red!   More an more, one can find harissa in larger supermarkets, but Moro makes their own.   Once you try this, store bought will never be OK.   Many harissa recipes call for dried peppers but Moro's spin it to use fresh peppers along side the canned piquillos.


Harissa

250 g long fresh red chiles
4 garlic cloves
Sea salt
3 heaped teaspoons coarsely ground caraway seeds
3 heaped teaspoons coarsely ground cumin seeds
1 level teaspoon ground black cumin seeds (optional)
100 g jarred piquillo peppers, or 1 large red bell pepper, roasted, peeled, and seeded
1 dessertspoon tomato purée or tomato paste blended with a little water
1 dessertspoon red-wine vinegar
2 level teaspoons sweet smoked Spanish paprika
6 tablespoons extra-virgin olive oil

1. It is advisable to wear rubber gloves when preparing the chiles. Slice the chiles in half lengthwise. Lay each chile, cut side up, on a cutting board, cut side up and gently scrape away the seeds and fleshy veins, discarding them. Roughly chop the chiles and transfer to a food processor. Add the garlic, a pinch of salt, and half of each the spices; process until smooth. Add the piquillos and process. It’s important that the paste is as smooth as possible.

2. Transfer to a mixing bowl. Now add the remaining ingredients—the rest of the spices, tomato purée, vinegar, paprika, and olive oil. Taste and season with more salt to balance out the vinegar. Harissa keeps well in the fridge, but be sure to cover it with a little olive oil to seal it from the air.

Now that you have it made, what to do with it???

At Moro, they bath a nice plump chicken in the paste and roast it.  Couldn't be better!

Monday, April 29, 2013

BAKED POTATO CHIPS

When I am on a diet, (who am I kidding, I'm always on a diet) my weight loss plan starts to falter when I get a craving for something crunchy and salty. I'm not talking about raw fruits and veggie type of crunchy, I'm talking about potato chip crunchy. If I ignore this craving, it just gets stronger; does that sound familiar to anyone?

I did some online searching for a remedy to my craving that wouldn't have a billion calories. I found three different recipes for baked potato chips that sounded promising.

After trying all three (and immediately tossing all three into the garbage), I decided to make up my own version. I must say I'm quite pleased with it. 

Not only does this little recipe completely satisfy my "crunchy chip craving" but the ENTIRE RECIPE only has one tablespoon of olive oil!!
 
Wash and dry six golf ball size Yukon gold potatoes. Slice them as thin as possible. A mandolin would work well for this, but I just used my sharpest knife and sliced them; just try to make them all an even thickness.

 
Toss the sliced potatoes with 1 tablespoon of olive oil, making sure that a little of the oil gets in between every slice. Lay the slices out on a heavy cookie sheet that has been lightly sprayed with vegetable spray, then sprinkle the potatoes lightly with kosher salt.

Baking time is important. One of the recipes I tried (and threw away) called for 2 hours at 200°F. That produced a dull, leathery piece of potato. I even let it cook an extra HOUR and it was still leathery...yuck.  Another recipe called for 18 minutes at 400°F which produced a crisp but burnt taste...yuck again.

So I decided to try Yukon gold potatoes. How long you bake them will depend on how thick you sliced your potatoes and how hot your oven runs. I baked mine in a 375°F electric oven for 22 minutes, flipping them over half way through the baking time....just right.


These chips are meant to be eaten right away because they are not meant to be stored like a commercial potato chip. There are small "non-crunch" parts on the chips that would not store well.

I hope you will try these. They have a WONDERFUL flavor and a fantastic, salty crunch!!!

NOTE:  Watch the chips closely the last couple of minutes because once they start to turn golden, they darken quickly.

Thursday, April 25, 2013

SIX MICROWAVE COOKIES

This fun little recipe is for those "I-need-some-chocolate-right-now-or-I'm-going-to die" moments in your life. Cookies from the microwave? Before today, I would have highly doubted their success, but my scorched tongue is proof that they ARE good AND that I was too impatient for them to cool off!!

This recipe only makes six small cookies, which is PERFECT better for my perpetual diet. Don't expect the same crispy cookie you would get out of the oven, but the taste is very much the same.

1 tablespoon butter (melted)
2 tablespoons brown sugar
1/4 teaspoon vanilla
pinch salt
1 egg yolk
1/4 cup all purpose flour
2 tablespoons chocolate chips

Mix everything and form into 1" balls, then flatten a little and put them on an UNgreased microwave safe plate. They don't spread much when they cook, so just put them an inch or so apart.

Microwave on high for 45-55 seconds (my microwave took 50 seconds). Now is the hard part......let them cool for a couple of minutes....then enjoy!!

NOTE: Do not be tempted to add any baking soda to this recipe.

Pig Curing & Cooking


We are big fans of Ambrose Heath and pigs.  The End. 

No, there is more.  We love cookbooks and food because, like so many things, everything old is new again.  Really, who hasn't dislocated a shoulder patting themselves on the back for serving pig ears?  Don't get me wrong, we love Fergus Henderson but he did not "invent" nose-to-tail eating.  Poor folks did.  If H.G. Wells traveled back in time and asked those poor folks whether they would rather be eating pig ears or steak, they would probably chosen the latter.  If you told them that you paid $12 for a pig ear sandwich, they would laugh at you.   Truthfully, they would probably rob you.  And feed you to the pigs.

In 1952, a full decade before Fergus Henderson was even conceived, Ambrose Heath wrote a quintessential nose-to-tail book on the pig: Pig Cooking & Curing.  There are recipes for Deviled Pig's Liver, Pig Ear Soup(and you thought they were only for sandwiches), Baked Pig Cheek, Pig Tail in Lentils, and so much more.  Heath includes all the meaty middle of the pig as well, loins, legs, chops, hams, and sausage. 

By now you know that cookbooks of this era have only vague directions for recipes.  But here is a favorite.  It has the date 1806 in parentheses, so my guess is Heath found this recipe and passed it on.  I love it for the title: Loin of Pork to Goosify.  I can honestly say we have have never seen the word "goosify" before.  At first I thought it was a way to make one's pork more like goose.  But that doesn't seem to be the case.   In modern parlance, "goosify" means to have an old lady grab your ass.  By "old" one would need to be over 30, 25 in some video arcades.  But we can find no reference as to why this leg of pork is being "goosified" or whether "goosified" is the past tense for "goosify" as we are sure it has nothing to do with grabassing pork (or whether "grabassing" is a word).   We are in uncharted territory.  Here is the recipe so you too, can gossify your leg o'pork.

Leg of Pork, to Goosify (1806)

Score your pork; stuff it with sage, onions, pepper and salt, a few crumbs and a little butter; stuff it at the shank end.  It will take two hours roasting as a good fire.  Serve it with apple sauce.
Calling all Lexicographers out there -- what did "goosify" mean in 1806?

In the meantime, we saw this on Facebook and while we rarely  never share puppy pix, quotes, blessings from any Deity, or school day photos, we did find this amusing and a bit apropos.

Twenty years ago we had Johnny Cash, Bob Hope and Steve Jobs.  
Now we have no Cash, no Hope, and no Jobs
PLEASE
Don't let Kevin Bacon die


Monday, April 22, 2013

Cookery From Experience


It has been so cold this week I have actually been thinking of making a fruit cake.   So I started pulling out some really old books to check out long ago and far away recipes.   I have a rather beaten up copy of Sara Paul's Cookery from Experience.  Written in 1875, Mrs. Paul book bears all the marks of the early cookbooks, including a good bit of information on housekeeping as well as tried and true methods for such things as removing tar and storing meat in hot weather. 

Removing tar required "soaking" it in lard, which begs the question, how then does one get the lard stain out?  Well that is another day...

I lust love flipping through these cookbooks from the late 1800's.  While there are seriously dated offerings, one can find recipes that seem to have been written by today's most innovative chefs.  


Mrs. Paul offered up several fruit cake recipes, but this one sounded the most promising. 

Fruit Cake, No. 1

One pound of butter, the same of sugar and flour, ten eggs, one pound of raisins seeded, one of currants washed and dried, and half a pound of citron cut in little strips. Stir the butter and sugar to a cream, add to them half a small nutmeg grated, a pinch of cinnamon and the rind of half a lemon grated; stir well; then add the yolks of the eggs beaten light; stir these well together, and then add the flour alternately with the whites of the eggs beaten to a froth; mix the fruit altogether, and stir in it two heaping tablespoons of flour, and stir it in the cake. Bake slowly nearly two hours; if browning too much, cover with thick paper. When the cake shrinks from the sides of the pan, and a broom splint run down the centre of the cake comes out clean and dry, the cake is done; and this is the test for all kinds of cake.


I have all of the ingredients and believe I shall go home, build a fire, and make cake.   Who would think it is just a week away from May...

Sunday, April 21, 2013

Two Ingredient Cake !!

This cake couldn't be easier and it is light and refreshingly delicious. It is great for any occasion, but PERFECT when you have to have a last minute dessert.

It only takes two ingredients, mixed together with a spoon...Easy-Peasy!!

1  box of angel food cake mix (dry mix nothing else)
1  20 ounce can of crushed pineapple (do not drain)

That's it!!  Mix in a large bowl because it really foams up as you stir. Pour it into a 9 x 13 baking pan (sprayed with vegetable spray) and bake it at 350 for 25-30 minutes (my electric oven took about 28 minutes).

Remove from oven and cool in the pan for about 20  minutes, then turn out onto a serving tray (or just leave it in the pan!!)

I frost mine with sweetened whipped cream that I stirred a little coconut into.

What could be easier and it is VERY tasty!!

Friday, April 19, 2013

Super Easy Velveeta Mac & Cheese

I know some food snobs will turn their nose up at a recipe using Velveeta cheese and that's OK, I don't use it very often either. However, Velveeta DOES make the creamiest macaroni and cheese, you have to admit it!!

A few days ago, Julie, over at Better than Burgers, posted a recipe she called KFC Mock Mac & Cheese. While I've never tried KFC mac & cheese, the recipe looked great. I made a couple of very minor changes to her recipe (and renamed it, lol). 

We loved it (and it couldn't be easier!!)


My recipe "tweaks" are in BLUE

Boil 2 cups of elbow macaroni for about 7-10 minutes (see note)
8 ounces of Velveeta cheese (see note)
1 cup shredded cheddar (I used sharp)
1/2 cup milk (I used 3/4 cup milk)
1/2 teaspoon salt  (I left this out)
1/2 teaspoon dry mustard powder  (my tweak)

Julie's recipe called for making the sauce in a pan, but I did it this way:

When the macaroni is almost done, put the Velveeta (cubed)+ the shredded cheddar + the milk and mustard powder in a microwave safe bowl. Microwave it on high for 1 minute, remove and stir.  Microwave it for one more minute and stir till smooth.

All microwaves are different, so watch yours for the final 30 seconds as to not over cook. The sauce will be very smooth.

Drain the cooked macaroni and stir into the sauce...that's all there is to it!! If you like "Velveeta Shells and Cheese" out of the box (the one with the foil pouch of cheese sauce) you will love this recipe.
NOTE: This recipe calls for 8 ounces of Velveeta cheese, fortunately, the Velveeta foil wrapper is marked in one ounce sections.
NOTE: Most elbow macaroni is boiled for about 7-8 minutes, but when I make macaroni and cheese, I like to boil the noodles an extra minute or so. It's just a personal preference.

Tuesday, April 16, 2013

Not a Cookbook -- Eat a Cicada

The Smithsonian has an idea for facing the coming cicada invasion.

A deep fryer and hot sauce.

Read about it here.


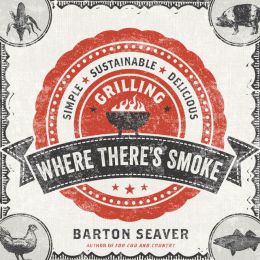
Where There's Smoke


D.C. chef  and sustainability advocate, Barton Seaver has published a grilling book entitled, Where There's Smoke. He brings his usual take on sustainability and applies it to everyone's favorite summer past time -- the barbecue. While most barbecue books concentrate on giant slabs of meat Seaver applies his sustainability ethics to what he puts on the grill. He includes a lot of vegetables and a lot of fresh seafood. Seaver is a firm believer in barbecuing with wood -- he loves the smoke. He believes in cutting his own wood.

He offered up one piece of advice that is different from many a barbecue book. He opts one the side of not soaking the wood before you put on the fire. After doing several studies where he soaked the wood, then cut through it to test the water absorption, he found that the soaking didn't actually get moisture into the wood and was probably more trouble than it was worth.
There are great sauces, sides, and desserts all infused with the power of smoke. This grilled broccoli rabe should be on every summer menu.
Grilled Broccoli Rabe with Walnut Anchovy Dressing and Egg
1 bunch broccoli rabe
Kosher salt
2 tablespoons extra virgin olive oil
One 2-ounce can oil- packed anchovies
1/4 cup walnuts, chopped
Juice of 1 lemon
2 eggs, hard-boiled and peeled, yolks remove for another use
Trim off and discard about 1/2 inch from the stem end of the broccoli rabe. Bring a large pot of generously salted water to a boil. Add the broccoli rabe and cook for 7 minutes, then drain it and lay the pieces on a baking sheet to cool to room temperature. Drizzle with 1 tablespoon of olive oil.
Heat the anchovies and their oil with the remaining 1 tablespoon olive oil in a small sauté pan over medium heat. Gently mash them into the oil with a spatula, then add the walnuts. Cook until the anchovies have melted into the oil and the walnuts are lightly toasted, about five minutes. Add the lemon juice and bring to a boil. Remove from heat and reserve.
Grill the broccoli rabe over the coals of the medium fire until it begins to char, 5 to 8 minutes. Do not turn or otherwise move the rabe until done.
Transfer the broccoli rabe to a platter and toss with dressing. Grate the egg whites onto the broccoli rabe with a box grader or by pushing them through the holes of the colander. Serve hot off the grill or at room temperature.
If you are looking for a great new addition to your summer cookbook list, Where There's Smoke is a must have.

Thursday, April 11, 2013

A Time To Cook


We have always loved Lee Bailey and have long lamented his passing.  At a time when "Southern" seems all the rage, one just needs to look back at Bailey's lovely collection of books to find the deep roots of the South.  Recently, however, we have found someone that just may be a likely successor to Bailey's easy style and Southern charm in the person of James Farmer III.

His new book is a cookbook, A Time To Cook.  In a market swamped with cookbooks claiming to be authentic Southern cookbooks, Farmer's roots reach deep in the red clay of the South.   We were delighted over at Lucindaville, to find the Church had elected a Southern pope since he chose Francis I as his name.  Jame Farmer can spot Francis I at a hundred paces.  He knows that cornbread cannot be made without an iron skillet.  And he tells a wonderful story about his grandparents having a contest to see who made the best cornbread using almost identical ingredients.   It is a wounder of cornbread that given the exact same ingredients, no two cornbreads would be alike.  A Southerner knows these things.

Every recipe has a story behind it.  Every woman that ever offered up a recipe is graciously thanked and given full credit, even if Farmer has tweaked them a bit.  We love our collards here, but we tend to like cooked down for several hours.   As a raw coleslaw ingredient?  Why not.

Collard Green Coleslaw

A small bunch (8-10 leaves without ribs) or ½ bag (8 oz.) washed and cut collard greens
½ medium head green cabbage
2 green onions
½ bunch flat-leaf parsley
2 tablespoons sugar
2 tablespoons apple cider vinegar
Mayonnaise
Salt
Freshly ground black pepper


In a food processor, process collard greens, cabbage, onions and parsley in batches until finely chopped, being careful not to over process.  Move each batch to a large bowl.

Dissolve sugar in vinegar in the microwave. Add  the greens and toss to mix well.

Add mayonnaise to suite your taste, and mix and moisten.  Season to taste with salt and pepper. 

When browsing his websites, we found this picture.  We have a similar flat whisk.


It  is a cherished possession.   My great-aunt Ruth used it to whip cream.  It was one of the most effective tools in the kitchen and seeing this bowl of whipped cream brought back memories from our Alabama porch.  You, too, can follow James Farmer III at his website

This boy can cook.  He can also garden, mix drinks and make lovely wreaths.   He is one to watch.  We are already waiting for the next cookbook!