Recipes from an Edwardian Country House

Recipes from an Edwardian Country House is a book that was repackaged from an earlier book. Frankly, I hate it when publishers do this sort of thing, as I often have the first book and then end up with another copy of the same book .

Seasonal Recipes From The Garden

For a long time my cable provider didn't provide a PBS station. It seemed weird, no PBS, but I learned to live it. After changing providers, I suddenly had PBS again.

Favorite Recipes of Famous Men

We are suckers for collections of recipes by "famous" folk. So naturally, Favorite Recipes of Famous Men a 1949 cookbook collection by Roy Ald is a great one.

Spoonbread and Strawberry Wine

There is not a single member of Norma Jean and Carole Darden's family that you want to hang out with. While most of them are gone now, they live on in this delightful cookbook and memoir.

Recipes from an Edwardian Country House

Recipes from an Edwardian Country House is a book that was repackaged from an earlier book. Frankly, I hate it when publishers do this sort of thing, as I often have

Wednesday, May 16, 2012

CLASSIC MACARONI SALAD

Everyone seems to have their own tried and true family macaroni or potato salad recipe. Some have lots of vinegar, some have lots of mustard, some have no eggs (yee gads!!) I even had some that had small cubes of sharp Cheddar cheese which was surprisingly tasty.

I remember when I was little, my folks took us back to visit our VERY German relatives in the Dakota's and one of my Aunts gave me some German potato salad. I was a huge fan of potato salad, but let me tell you that hers was not like any other potato salad I had ever tasted. It was not only FULL of vinegar and bacon grease, but it was HOT!! It's been over 50 years but I still can remember my shock!!  lol

What do you put in YOUR macaroni (potato) salad?


2 cups dry small seashell macaroni
½ cup chopped onion chopped (fairly fine)
3 stalks of celery with leaves chopped (fairly fine)
½ cup red bell pepper chopped (optional)
1 cup grated carrot
3 large pickles chopped (favorite flavor)
4 hard-boiled eggs chopped
½ teaspoon black pepper
1 cup lite mayonnaise
3 tablespoons yellow prepared mustard
3 tablespoons pickle juice

Boil macaroni for 8 minutes (or as recommended on box), then rinse under cold water, and drain very well.

NOTE: Many recipes warn you not to rinse cooked macaroni, however, I find that macaroni salad stays creamier if you rinse the starch off of the cooked macaroni before you add the mayonnaise to the salad.

Add chopped veggies, eggs and pickles to the cooked and rinsed macaroni. Whisk the mayonnaise, mustard, pepper and pickle juice together and gently stir into the macaroni-veggies.

IMPORTANT: This salad really needs to sit in the refrigerator overnight so the flavors can blend together…it makes a huge difference.

NOTE: I do not add salt to this salad because there is already a lot of salt in the pickles, pickle juice and mustard.

NOTE: Just before I put this salad into the fridge, for the first time, I put a piece of wax paper (or plastic wrap) on the surface of the salad and then I lay 2 paper towels (folded) on top of the wax paper and snap the Tupperware lid on. The paper towel will attract any condensation in the bowl and the waxed paper (or plastic wrap) will keep the moisture from running down into the salad. Once the salad is in the fridge overnight, discard the wax paper and paper towel.

NOTE: The amount of mayonnaise you use is up to you. Start with 1 cup and add more if you like your salad creamier.


Tuesday, May 15, 2012

The Farm


Seriously, that whole farm-to-table idea has gotten so twee.  Everyone with a fourth-floor walk up and a can of compost envisions themselves a farmer.   And I applaud it, I do.  Now if you are looking for an authentic farm experience, give Ian Knauer's The Farm a try.   Knauer worked as a recipe tester for Gourmet for many years but people began to notice that his recipes were often to better than the ones he was being asked to test.

Truth be told, he also spent a lot time on the farm... an actual farm in the Pennsylvania countryside.   Like many people, Knauer packed up and moved from the idyllic countryside to find fame and fortune in the big city.  The big city is just that --big; and a city.   Knauer conned his sisters into heading back to their childhood haunts to work the family farm for a year.  The nostalgia of garden tomatoes proved too much to pass up.

Knaur takes the reader though a year in his family garden.  It has memories and history and some great food.  There are a lot of cool recipes in this book, but this is the kind of cake we love.   It is a recipe from Ian's grandmother, whose farm was thick with black walnuts.  


Black Walnut Cake

2 cups all-purpose flour
1/2 cup black or English walnut pieces
1 1/4 teaspoons baking soda
1 teaspoon kosher salt
2 sticks unsalted butter, at room temperature
1 1/2 cups sugar
2 large eggs
1 teaspoon vanilla
1 1/3 cups buttermilk


Preheat the oven to 350°F, with a rack in the middle. Butter and flour a 9-inch-square cake pan.

Whisk together the flour, walnuts, baking soda, and salt in a medium bowl.
Beat together the butter and sugar with an electric mixer until pale and fluffy, about 4 minutes. Add the eggs one at a time, beating well after each addition, then beat in the vanilla. Add the flour mixture and the buttermilk alternately in batches, beginning and ending with the flour mixture and mixing until just combined.

Pour the batter into the cake pan and smooth the top. Bake until a wooden toothpick inserted in the center comes out clean, 45 to 55 minutes. Cool in the pan on a rack for 1 hour. Invert the cake over a cake plate and serve.
I love to watch Ian Knauer on Unique Eats.   Rumor has it he might have a new show this year on NBC Sports.  He used to have a fine blog, but I guess writing a cookbook took him away from all that.  Ian, honey, please keep linking your info to your blog.

Friday, May 11, 2012

Cooking In A Castle


My friend, Anne, recently sent me home with French cookbook entitled Cooking In A Castle by William Kaufman.  It's a tough job, traveling around France, visiting castles and eating their food, but someone has to do it.  (Why isn't it me?)

The book is chocked full of pictures of castles, but nary a morsel of food.  Still, it offers up some interesting recipes.  It seems that in France, as in much or the world, owning a castle is not cracked up to what it used to be.  One must keep up the building and grounds without loyal subjects who face the guillotine if they do not obey.  So many of these later day chateau owners have become defacto hoteliers to keep the lights on.

The book, published in 1965, offers up a Red Devil Cake.  This version of a Red Velvet Cake is usually found in books about the American South, not the South of France, but there it is in all its glory, illustrating that the history of our popular red cake is not as unique or as Southern as we think. 


Today's recipe is from the Cahteau de Cheronnac.  Its major claim to fame is that at one time (when this book was written) it was owned by Lily Fayol, chanteuse extraordinaire.

As summer is creeping up on us, I am always on the lookout for tomato recipes.  This recipe for a Tomato Pie has my mind spinning with all the different ways I can make (improve) it.


Tomato Pie

Pastry for one pie crust
6 large, firm tomatoes, sliced
1/3 to 1/2 cup butter
Salt, pepper, curry powder


Cut a 14 inch circle of aluminium foil; place on baking sheet and flour lightly.  Roll out pastry into a 14-inch circle; flute edges if desired.  Bake in a 425 F. oven for 10 minutes; remove.  Sprinkle tomato slices lightly with salt, pepper and curry powder.  Dredge in flour.  Melt butter in a large skillet.  Fry quickly on both sides until brown and crisp.  Place tomato slices on top of the pastry side by side. Bake in 350 F. oven 12 to 15 minutes.

This looks like a definite summer staple.

Wednesday, May 9, 2012

Hominy Grill Recipes


Yes boys and girls, vacation made me stupid.  So I have been lax in my postings and I apologize.  But I did get some cool offerings as I ate my way across Charleston and Savannah.  So let us begin.   Stopped in at the fabulous Hominy Grill.   (If you did not see my posting at Lucindaville, I left on my vacation with a bunch of newfangled photo apps that I did not make the best of.  Like old Polaroids, most every picture I took sucked.  But since one no longer has the limitation of the cost of printing actual film... there are a plethora of BAD pictures to go around.)


The Hominy Grill is known for its Big Ugly Biscuit.  It involves a large biscuit, a large piece of fried chicken stuffed into the biscuit.  A scoop of cheese on top of the chicken.  Finally and ladle of sausage gravy to add a certain lightness to the mix!   How good is that!


Pretty darn good.  Along with the food one can get t-shirts, mugs and a small cookbook.   While the Big Ugly Biscuit is not in the cookbook, the actual biscuit recipe is included.    But the best thing in the cookbook is their chocolate pudding recipe.

It seems that Alton Brown showed up about a year ago and no one noticed him.  Then the Food Network did one of their "Best Thing I Ever Ate" shows about chocolate and Brown said the best chocolate he ever ate was the chocolate pudding at Hominy Grill.  It tasted he said, "like sucking the soul out of a little chocolate Easter bunny."


Chocolate Pudding

8 ounces bittersweet chocolate
1/2 cup sugar
6 egg yolks
4 cups heavy cream
1 teaspoon vanilla extract
1/2 teaspoon salt


Preheat oven to 350 F.

Chop chocolate, reserve in bowl.

Whisk 1/4 cup sugar into egg yolks. Mix rest of sugar with cream & vanilla in saucepan, bring to a boil. Pour a little hot cream into bowl with egg yolks for smoothness and then pour the remainder over chocolate, stir with spatula until smooth. Add egg mixture and salt, then train into a pitcher.

Refrigerate until cool.

Pour into 2/3 cup ramekins, place ramekins into a shallow baking pan half filled with water & cook for about an hour.


Chill for at least 3 hours before serving.

I was told, the chef's secret is using not just any bittersweet chocolate but using Callebaut chocolate.  Well, it was quite the experience.  Here's Alton with a bit of extraneous stuff from the show.


INDIVIDUAL YORKSHIRE PUDDINGS

On VERY special occasions, my British mother used to make roast beef with Yorkshire pudding. She baked the pudding in a 9" x 9" pan and I can still picture the huge golden "puff" coming out of the oven. Of course, it always collapsed by the time she brought it to the table, but we all thought it was SUPPOSED to look like that and we eagerly dunked chunks of the tasty treat into mom's deliciously perfect beef gravy; Mmmmmm, I can still taste it.

Recently, I decided to make a couple of changes to my Yorkshire pudding recipe. First, I made them into individual puddings and secondly, I decided to serve them with roast chicken and gravy, so I added a little poultry seasoning and onion powder  into the batter; what a nostalgic treat!!

 This recipe is fool proof as long as you follow it closely.

The cooking times for these individual Yorkshire puddings work well if you bake them in one of those over-sized cupcake pans, I believe they are called Texas size muffin pans; a popover pan will work well also. If you use a standard cupcake pan, you'll have to reduce the cooking time.

Put your UNGREASED pan in a COLD oven and then preheat the oven and pan to 425.

While your oven/pan is preheating, whisk together:

3 eggs
¼ teaspoon salt
¼ teaspoon onion powder (not onion salt)
½ teaspoon poultry seasoning  (if you use chicken gravy)
1 cup of milk (see note)
1 tablespoon melted butter

NOTE: If I have whipping cream, I put about ¼ cup of whipping cream in a measuring cup and then fill the rest of the way with 2% milk...if I have no cream on hand, I just use 1 cup of 2% milk.

After the above ingredients are whisked together well, add one cup of all purpose flour (spoon flour into measuring measuring cup and level off with straight edge). Whisk everything together until it looks very smooth and creamy. Let batter sit at room temperature while your oven preheats.

Working quickly (so your pan doesn't cool off) take your pan out of the hot oven and spray each cup with vegetable spray. Put a small chunk of COLD butter (roughly ½ teaspoon but the exact size is not crucial) (see note below) into the bottom of each hot cup (don't wait for it to melt). Fill each cup half way full.

Bake at 425 for 20 minutes. After 20 minutes, turn the oven down to 325 (don't open the oven door) and bake for another 15 minutes. Remove puddings from pan and poke a tiny hole (I use a toothpick) in the bottom of each popover to relieve a little steam (not totally necessary if you are going to eat them right away).

The inside of the Yorkshire pudding is full of light batter with holes, which is perfect for holding butter and gravy.

NOTE: Traditionally, you are supposed to pour the batter over hot beef fat  in the bottom of each muffin cup, however, I couldn't bring myself to do that (and besides I was serving them with chicken), so I used butter and it works great.

NOTE: If you are serving these with roast beef, omit the poultry seasoning and add whatever seasoning you like.

NOTE: This recipe makes six generous Yorkshire puddings.

Wednesday, May 2, 2012

BAJA SAUCE (Taco Bell Clone)

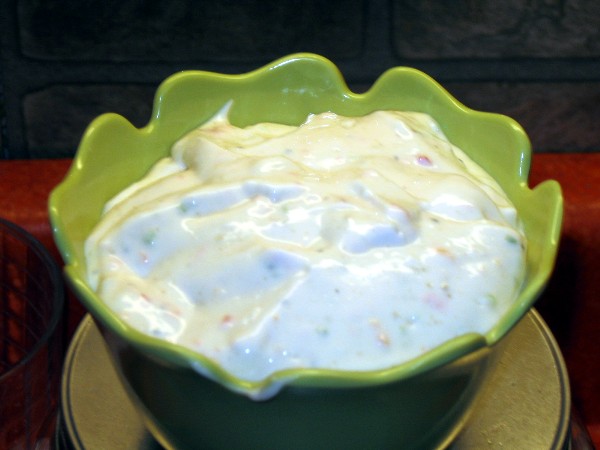
Taco Bell has a condiment that I adore, it is called Baja Sauce and it is cool, creamy, spicy and completely addicting (plus it is oh so easy to make).

 1/4 of a red bell pepper
1 jalapeno seeded chopped(see note below)
2 tablespoons diced onion

Put the above ingredients in a food processor, and chop until very fine.

Mix
6 teaspoons of the above chopped
1/2 cup mayonnaise
1/2 cup sour cream
1 tablespoon vinegar
1/4 teaspoon black pepper
1/4 teaspoon garlic powder
1/4 teaspoon ground cumin

Mix well and cover. Chill overnight.

NOTE:  I use a very small jalapeno and remove the seeds and ribs  to lessen the heat factor for picky-picky husband, but if you like more "heat", use a larger pepper or leave some of the seeds  in.

NOTE: I've never tried Miracle Whip in this recipe, so I can't comment on that. I used light mayonnaise and light sour cream and it worked very well.

NOTE: Make sure you let it sit in the fridge overnight, makes all the difference in the world.

NOTE: This keeps in the fridge for several days.

Saturday, April 28, 2012

SUNDAY MORNING FLUFFY BISCUITS

I have been biscuit "challenged" for many years, so when I'm in a hurry, I usually resort to a tube of commercial rolls and try to jazz them up, but they are pretty unmistakable (and getting expensive!!). 

The last few years, I've tried out a lot of biscuit recipes, in hopes of finding the perfect one; one that is flavorful, light, fluffy and EASY............here is my latest success...YUM!!!

Made with baking powder, baking soda, buttermilk AND yeast, these biscuits are light and fluffy. Hot out of the oven with butter and honey, they are a winner!!!

In a small bowl, mix 1 packet of dry active yeast, a pinch of sugar and ¼ cup of warm water (set aside). After a few minutes, it should be foamy like this:
2½ cups of all purpose flour
½ teaspoon baking soda
1½ teaspoon baking powder
½ teaspoon salt
1 tablespoon of white sugar
6 tablespoons Crisco flavored shortening
1 cup buttermilk (see note)

Stir dry ingredients together and then cut in the shortening until it is about the size of small peas. Stir in the dissolved yeast and buttermilk. Mix well, but do not over mix. Turn out onto floured board and roll to ¾” thick. Cut with a 3” biscuit cutter. Place on parchment paper and bake in preheated 400° oven for 12-14 minutes or until nice and golden. Brush with melted butter when they come out of the oven; they make fantastic breakfast sandwiches!!

NOTE: No kneading needed.

NOTE: This recipe does not work as well if you use butter instead of shortening. I use butter flavored Crisco in all my recipes that call for shortening.

NOTE: Don't be tempted to use your food processor when cutting in the shortening, it will process the shortening to much, it is better to have larger pieces of butter than super fine. I use my pastry cutter.
NOTE: Do NOT add all of the buttermilk at once. Add about 2/3 of it and see if that is enough. Personally, I think 1 cup of milk is too much, but everyone’s flour is different. Just flour your board enough so that the biscuits are not sticky.

NOTE: If you don’t have parchment paper, spray your pan with vegetable spray.

NOTE: Don’t use a twisting motion when you are cutting your biscuits. It seals off
the edges and they won’t raise very high.

Monday, April 23, 2012

FIVE STAR GREEN PEA SALAD

We still have a lot of snow around the edges of the yard (several feet of it as a matter of fact), but it won't be long before it's barbecue season again, so my thoughts are turning towards side dishes that can be prepared ahead of time. 

Summer Pea Salad, jazzed up with crisp bacon and tomatoes is one of my favorites. It is one of those great salads that travels well and tastes even better after it has been in the fridge for a day or two. If you are going to make this salad, in advance, don't add the crisp bacon right away (it will get soggy), just sprinkle it over the salad before serving.
16 ounce bag of frozen green peas
1/3 cup finely chopped red onion
1/2 cup grated carrot
1/2 cup celery chopped
1 cup thinly sliced mushrooms
1/2 cup red bell pepper chopped
3 slices of crisp bacon cut up (optional)
1/2 cup sharp cheddar cheese shredded (I use more)
cherry tomatoes, cut in half
sunflower seeds

Fresh green peas are the best in this salad, but when they are not available, frozen peas work very well too.  Microwave peas (covered) with 1 tablespoon of water for about 3 minutes or until slightly cooked (but not soft) then drain and cool.

In a large bowl, mix all of the above ingredients together (except the cherry tomatoes); gently fold in the dressing.

Dressing
3 heaping tablespoons of light mayonnaise
1 tablespoon freshly squeezed lemon juice
2 teaspoons sugar
1/2 teaspoon black pepper
1-2 tablespoons milk
Whisk the ingredients together and gently fold into salad.

Add cherry tomatoes and an extra sprinkle of cheese to the top of the salad for decoration. Cover and chill.
NOTE: Every microwave cooks at a different rate, so keep an eye on your peas when you microwave them. You don't want them to get overcooked and mushy.

Monday, April 16, 2012

Eating Our Way...

...through Charleston & Savannah. Follow the adventure @Lucindaville.

Friday, April 13, 2012

Wood-Fired Cooking


It is clear that I was an arsonist in a previous life. I love fire. I love cooking. So cooking with fire...that is the best.

Let's start at the beginning. In the beginning man cooked meat over an open flame. He survived, so really, how hard can it be? Well, harder than one might imagine. There is fire, but what kind of fire? Charcoal? Wood? What kind of wood? What kind of fire container? There are wood ovens, campfires, grills, big green eggs. Yes, meat is the obvious but what about breads and vegetables and seafood, oh my!

This is where Mary Karlin and Wood-Fired Cooking comes in. She has answers to all these questions. If they are not in the book, there are many answers at her web site, Elements of Taste. There you can also sign up for special cooking classes and find the most eco-friendly charcoal among other things.

Most cooing with wood type books are heavy handed on the barbecue side. Meat, sausage, a rub, a glaze, a sauce, throw in some beans and grilled fruit and there you are. With Wood-Fired Cooking one could just as easily leave out the wood-fired and have a great cookbook. (This is, of course, a bad idea as one would not get the nice char marks and smokey goodness that cooking over fire produces, but I digress.)

The book provides several cooking options depending upon each individual cooking nerd. (I mean that in a nice way, but if you have a roasting box and a big green egg invite me over!) Here is Karlin offering several ways to cook a duck or a chicken.

Tea-Brined Mahogany Duck


Tea Brine

8 cups water
1/2 cup
Darjeeling or oolong tea leaves
3 slices
fresh ginger
2
star anise pods
1/3 cup
soy sauce
1/4 cup
honey

Two 3-pound
ducks, or one 5-pound roasting chicken

Basting Sauce

1 cup
reserved tea brine
1 tablespoon
hoisin sauce
4 tablespoons
soy sauce
3 tablespoons
honey


To make the brine, combine the water, tea leaves, ginger, and star anise in a saucepan and bring to a boil. Remove from the heat and let steep for 30 minutes. In a large nonreactive container, combine the steeped tea, soy sauce, and honey and stir until the honey is dissolved. Refrigerate for 1 hour.

Add the bird(s) to the brine; refrigerate ducks for 4 hours, chicken for 6 hours. Keep the bird(s) submerged by placing a plate on top to weight down and at a temperature of not more than 40°F (4°C). Remove from the brine 1 hour before cooking. Rinse and pat dry.

Prepare a medium-hot fire 400°F (200°C) in a wood-fired oven or cooker.


To make the basting sauce, combine all the ingredients in a bowl and stir until the honey is dissolved.

To roast in a box roaster, place the bird(s) breast side down on a wire roasting rack in a roasting pan or clay baker and baste with the basting sauce. Light the charwood once the bird(s) is in place. Roast, covered, with indirect heat for 1 hour. Being careful not to pierce the skin, turn over, baste, and roast for 30 to 45 minutes, or until an instant-read thermometer inserted in a thigh registers 175° to 180°F (79°C to 82°C).


To roast in a wood-fired oven or ceramic cooker such as a Big Green Egg, place the bird(s) breast side down in a roasting pan and baste with the basting sauce. Roast for 1 hour. Being careful not to pierce the skin, turn over, baste, and roast for 30 to 45 minutes, or until an instant-read thermometer inserted in a thigh registers 175° to 180°F (79°C to 82°C).

Let sit for 10 minutes before carving and serving.


Birds and fire...what a great combo. If you are looking to get yourself or someone you know a "barbecue' book for summer, grab a copy of Wood-Fired Cooking. The food will be better for it.


Wednesday, April 11, 2012

BACON

Mmmmm, Bacon!!

I am never frying bacon again!! Don't get me wrong, we are not removing bacon from our menu, it is just the frying method that I will never do again. Don't you hate cramming 4 or 5 pieces, at a time, into your largest frying pan... trying to get them all to lay flat as they curl up and leave those white fatty ends on each piece?!?!?  Me too, so I went on an Internet hunt for a "flat bacon miracle" and I found a super easy one!! Maybe everyone already knows about this method, but I sure didn't and I can tell you right now, I'll never fry bacon in a frying pan again!!

Using a large baking sheet that has a lip on it, spray it with a little cooking spray (probably not really necessary, but it makes for easier clean up) and line up the raw bacon slices, side by side, like this (my baking sheet cooked a 12 ounce package of bacon all at once.
Now, depending on how thick your bacon is and how hot your oven runs, it takes roughly 20-25 minutes at 375 degrees (I don't even pre-heat the oven) to bake the whole package at once!! No turning slices, no splattering in your oven, no bacon fat skin burns and no curly bacon....its magic!!

Start watching the bacon at about 20 minutes for regular thickness sliced bacon (I've never timed the thick sliced stuff). It comes out absolutely perfectly flat and Picky-picky husband who is one of the strictest bacon critics that I've ever met, gave this bacon BOTH thumbs up and raved about what a great texture and taste it had.....well, blow me over!!
Not only is this a wonderful way to cook mass amounts of bacon, but it leaves your entire cooking range free for whatever!!

NOTE: If you like super crispy bacon, just leave it in for an extra minute.

Sunday, April 8, 2012

MAPLE PECAN PIE

Picky-picky husband quizzed me on what flavor pie I was making this morning and when I told him it was maple pecan, my "pecan pie purist" husband wrinkled up his nose and went silent...(no fear...I'm used to that response ha! ha!). However, I've noticed him cutting extra slices from the pie more than once today, so I'm guessing he approves (everyone else loved it too!!).

This recipe is a nice, sweet change from traditional pecan pie since it's made with real maple syrup and it goes together quick and easy!! 

2 teaspoons butter
1½ cups pecans
3 eggs
1 cup real maple syrup (not pancake syrup)
1/2 cup granulated sugar
1/3 cup melted butter
1 teaspoon vanilla extract
1/2 teaspoon maple extract
1/2 teaspoon salt

Melt 2 teaspoons of butter in a frying pan and toast the pecans for a couple of minutes. Be very careful because they burn FAST!! Let the toasted nuts cool for about 10 minutes before adding them to the pie filling.

Mix everything else in a large bowl, using a whisk to combine well.  Stir in the cooled pecans and pour this filling into an unbaked 9" pie shell.

Bake in a preheated 350 oven for 45 to 50 minutes or until the filling is set and puffs a little. My oven takes the full 50 minutes.  Cool to room temperature before slicing.

NOTE: The first time I made this pie, I didn't watch the pecans close enough and they scorched (an expensive lesson!!). So most of the time, I toast them in the oven while it is preheating (just to be safe).

Passover Cookbook

I find it interesting that there are a number of Passover cookbooks but very few Easter cookbooks. Since we have been wishing everyone we know a Happy Easter, we thought we might take this opportunity to offer up a Passover entry. Since we realized we didn't have anything that might fill our Easter Cookbook needs, we thought we might give Passover the spotlight.

Linda Amster culled the New York Times archives to find this collection of great Passover recipes. No I will admit that I have never cooked for a Seder, but I have been to a couple. With this cookbook, it think I might just be able to cook for one. It has been noted that this cookbook features six kinds of haroseth and seven versions of matzoh balls. And so much more. There are recipes from Alice Waters, Charlie Trotter, Wolfgang Puck, and this salmon by Jean-Georges Vongerichten.


Baked Salmon With Basil Oil

4 6-ounce salmon fillets, skin on
1/3cup light olive oil
1cup basil leaves
Coarse sea salt and freshly ground pepper to taste
4sprigs of basil for garnish

1. Preheat the oven to 250 degrees. Season the salmon with a few drops of olive oil and put it on an oiled baking dish.

2. Wash and drain the basil leaves and dry them thoroughly in a salad spinner. Puree them in a blender with the remaining olive oil until smooth. Season to taste with salt and pepper.

3. Bake the salmon for 10 minutes. If the skin peels away easily and the salmon flesh flakes when tested with a fork, it is done even though it may not look it (if you prefer it well done, return it to the oven for three more minutes). Sprinkle the salmon with salt and pepper.

4. Put the fillets on heated individual plates and sprinkle the basil oil in a circle around it. Put a sprig of basil on top of the fish and serve.


Truth is, while these are touted as Passover recipes, they are great for any day of the year.

Thursday, April 5, 2012

VEGGIE CORN BREAD

This super MOIST and tasty (veggie filled) corn bread starts out with two of those little Jiffy corn bread mixes (what could be easier?) and feeds a crowd. It is equally delicious warm or at room temperature, so it is perfect for a pot luck or holiday brunch.
 
(2) boxes Jiffy corn muffin mix
4 eggs (beaten)
1½ sticks butter (melted)
(2) cups broccoli florets (chopped)
1 cup of frozen corn (thawed)
1 medium onion (chopped) saute until tender
1 cup cottage cheese
1/4  teaspoon dry red pepper flakes (or to taste)

Saute broccoli, corn and onion until tender, set aside. In large bowl, beat 4 eggs together and stir in melted butter, cottage cheese and pepper flakes. Add Jiffy mixes and stir until smooth. Gently stir in broccoli, corn and onion. Spread in a greased 9 x 13 baking dish and bake (375°) for 35 to 40 minutes or until lightly browned.

LOTS OF VEGGIES INSIDE

NOTE: Finely diced sweet red pepper is pretty in this cornbread too, but I was out of it.

Wednesday, April 4, 2012

Not A Cookbook ...


... but we were quite amused by this New Yorker cartoon from the current issue.

Tuesday, April 3, 2012

Bought, Borrowed & Stolen


We have been quite fond of Allegra McEvedy since we got a copy of her first book, The Good Cook. McEvedy believes in straightforward cooking with great ingredients. That's it. Since The Good Cook, she may be best known for starting Leon, a healthy, fast-food, restaurant chain, like McDonald's only the Big Mac is butternut squash with lentils. (She has since moved on to other things.)

Bought, Borrowed & Stolen is a cookbook, travelogue, and knife lovers dream. The premise of this cookbook is a bit different and engaging. McEvedy shares recipes from her numerous travels based a a particular knife she procured, legitimately or not, from each culinary adventure. Since the recipes are far flung and a sometimes a bit exotic, they may be a bit more complicated than some of McEvedy's usual fare, but they are worth every story. If there is a drawback to this book, it is the fascination with the knives. It would seem that more ink has been given to the tools rather than the food. And why should we be different. (Seriously, you know we love kitchen gadgets!) So here are some knife facts cribbed from The Guardian and the book.


1. Picnic knife, Turkey

My mum bought this one in a Turkish hardware shop because we were going to have a picnic. It is so basic and has no place among my professional tools, yet I love it because when I hold it, it takes me back to that lunch in the biggest pine forest I had ever seen.

2. Artisan knives, New York

The chap responsible for these beauties is a blacksmith (and ex-farrier), with a suitably grizzly beard for a bloke whose best friend is an anvil. Michael Moses Lishinsky operates under the name Wildfire Cutlery (he actually works out of Oregon). His knives are full tang, which means the metal from the blade extends all the way through to the heel, making them stronger. These are made of heat-treated carbon steel, as opposed to stainless steel, so you have to dry them after use (I oil mine too), but they stay sharper longer.

3. Suction-free, San Francisco

I was sitting at a bus stop between restaurant shifts when I noticed my knife roll had gone. Like the scars on my arms, my knives represented my professional culinary journey. Next payday I went down to Japantown to get my first replacement. I had never seen a knife with holes in it before. The idea is that as you are chopping veg super-fast, the holes help to break any suction, so the slices don't stick to the blade (although I have never noticed them make much difference). I was feeling nervy about knife theft, so I went straight to an engraver's and carved my initials on it.

4. Pig-leg boner, Brazil

As I walked past a hardware shop in Salvador, I was attracted to this by its weird shape. When I got home I took it to my butcher but none of us could see how having the handle so high above the blade helped. When I return to Brazil I'm taking it with me and getting a demo – until then it remains my strangest and least-used knife.

5. Pastry slicer, Morocco

The knife man in the main souk in Marrakech sat on a carpet, surrounded by wood shavings. He carved this one to tackle pastry (especially filo) and cakes and I have found it most useful. Shaped from lemonwood, it is the most pleasing thing to hold.

6. Butcher's Chopper, Hong Kong

As I wandered around a vast indoor market in Kowloon, with about 100 butcher's stalls, I noticed that all of them had this knife. It's a serious butcher's knife, made of wood and stainless steel, with well-balanced weight for one so large.

7. Lorenzi's ceramic knife, Italy

G Lorenzi's in Milan is one of the finest names in sharp implements. Ceramic knives keep their edge much better than steel knives, and with that comes an almost surgical precision (mine is the only straight-edged – as opposed to serrated – knife that I use to slice tomatoes). And they are easier to keep clean as the ceramic doesn't absorb odours as much: I've done the garlic test on that.

8. Unagi-Saki, Japan

In Japanese cuisine, almost every job has a specific knife for it. This one is for cleaning eels.

9. Cleaver, Mexico

I like the mid-size of this cleaver: not as daunting as my enormous Chinese chopper, which I use only for the occasional precision strike. This is in my regular armoury for the way it goes through chicken bones, pork ribs, racks of lamb, even fish steak.

10. Fisherman's Friend, Norway

This is a Scandinavian design classic. It has a Japanese steel blade and is extremely efficient at filleting fish.

11. El Jamonero, Spain

No prizes for guessing what my jamonero is for: all 25cm of it are designed to slice ham. Factory-made by Arcos (a well-known Spanish knife producer), its handle is cool to hold and there is a reassuring weight to it. Slicing this dense meat is suprisingly difficult, but the dimples down both sides of the blade help by letting air in, so less pressure is needed and you can keep your strokes smooth. I like the fact that the Spanish still carve ham by hand.


While the cutlery is impressive, the recipes are also quite grand. We are willing to admit that most of these recipes will never end up on our plate, but just seeing them is enough for us.


Burmese Duck Egg Curry

6 duck eggs
125ml / 4fl oz light oil (such as peanut/grapeseed)
2 banana shallots (or 4 regular), peeled and sliced into thin rings
2 onions, peeled and chopped
½ teaspoon turmeric
2–3 bird's-eye chillies, sliced very small
4 cloves of garlic, finely chopped
½ a thumb of ginger, washed, gnarly bits trimmed (but not peeled), finely chopped
1½ tbps tomato purée
1 tbps curry powder
250g/8oz okra, trimmed and cut into thirds/halved, or little ones left whole
3 medium tomatoes, chopped large
½ tsp shrimp paste (optional but authentic, though if you want to keep it vegetarian just add a bit more salt)
A handful of chopped coriander
Salt


Bring a pan of water to the boil and carefully lower in the duck eggs. Cook them for 4–6 minutes, depending on size, then drop them into the sink to crack the shells and run them under cold water.

Heat the oil in a wide saucepan. When it's hot, drop in the shallots, breaking them up into rings. Once they are a deep golden brown (5–8 minutes), use a slotted spoon to transfer them on to kitchen paper and sprinkle immediately with salt.

Put the duck eggs into the hot oil and lower the heat. Fry them for 3–4 minutes, turning them to brown on all sides, then take them out of the pan and sit them on kitchen paper, too.

Keeping the pan on a medium heat, add the onions, turmeric, chillies, garlic and ginger and fry for a few minutes, until it all starts to soften, then stir in the tomato purée so that the onion is well covered in it. Cook for a minute or two before adding the curry powder and then stir that in well, too.

Add the okra with a big pinch of salt, followed by the tomatoes, and give it all a good stir. Dissolve the shrimp paste in 500ml of hot water, pour it into the pan and bring to a fast simmer. Let it bubble away busily for around 10 minutes without a lid to reduce, then lower the eggs back into the pan giving them a prod so they are mostly submerged in the liquid. Put the lid on and simmer for just another couple of minutes so that the eggs warm through, then turn the heat off and give it a 3 minute rest.

Finish by sprinkling a little salt on each egg and scattering on the shallots, with roughly chopped coriander on hand to top off each serving.


As someone who may have a ill-gotten knife here or there, I found this book to be great fun. Thanks, again, to The Guardian, we have the opportunity to actually watch Allegra McEvedy cook the above recipe. Check her out.