Recipes from an Edwardian Country House

Recipes from an Edwardian Country House is a book that was repackaged from an earlier book. Frankly, I hate it when publishers do this sort of thing, as I often have the first book and then end up with another copy of the same book .

Seasonal Recipes From The Garden

For a long time my cable provider didn't provide a PBS station. It seemed weird, no PBS, but I learned to live it. After changing providers, I suddenly had PBS again.

Favorite Recipes of Famous Men

We are suckers for collections of recipes by "famous" folk. So naturally, Favorite Recipes of Famous Men a 1949 cookbook collection by Roy Ald is a great one.

Spoonbread and Strawberry Wine

There is not a single member of Norma Jean and Carole Darden's family that you want to hang out with. While most of them are gone now, they live on in this delightful cookbook and memoir.

Recipes from an Edwardian Country House

Recipes from an Edwardian Country House is a book that was repackaged from an earlier book. Frankly, I hate it when publishers do this sort of thing, as I often have

Monday, May 30, 2011

Plenty


In 2006, The Guardian asked Yotam Ottolenghi to write a weekly column on vegetables. “The New Vegetarian” proved to be a runaway hit with readers and it spawned Ottolenghi second cookbook, the vegetarian That led to a vegetarian Plenty. It is often noted that Plenty spent a great deal of time on the England’s best-seller lists jostling with some girl with a dragon tattoo! Who knew veggies could be so scintillating.

If there is any irony to this accomplishment, it is that Ottolenghi is not a vegetarian, himself. In fact, he caused quite the stir when he boldly announced, “You can be vegetarian and eat fish.” This sent the died-in-the-wool (or should I say, the-vegetable-dyed-in-the-hemp) vegetarians into a frenzy and her later tweeted, “To all, fish eaters are NOT vegetarians!”

I feel if you are going to be a vegetarian, you should be a vegetarian that eats meat, but I digress.


Recently, Yotam Ottolenghi paid a visit to Martha Stewart, who was gaga over Plenty. He made the following tart:

Caramelized Garlic Tart

375g all-butter puff pastry
3 medium heads of garlic, cloves separated and peeled
1 tablespoon olive oil
1 tablespoon balsamic vinegar
220ml water
¾ tablespoon caster sugar
1 teaspoon chopped rosemary
1 teaspoon chopped thyme, plus a few whole sprigs to finish
120g soft, creamy goat’s cheese
120g hard, mature goat’s cheese
2 free-range eggs
100ml double cream
100ml crème fraîche
salt and black pepper

1. Roll out the puff pastry into a circle that will line the bottom and sides of a 28cm, loose-bottomed tart tin, plus a little extra to hang over the edges of the tin. Line the tin with the pastry. Place a large circle of crumpled greaseproof paper on the bottom and fill up with baking beans. Leave the tin to rest in the fridge for about 20 minutes.

2. Preheat the oven to 180°C/Gas Mark 4. Place the tart case in the oven and bake blind for 20 minutes. Remove the beans and paper, then bake for a further 5-10 minutes, or until the pastry is golden. Set aside. Leave the oven on.

3. While the tart case is baking, put the garlic cloves in a small saucepan and cover them with plenty of water. Bring to a simmer and blanch the cloves for 3 minutes, then drain well.

4. Dry the saucepan, return the garlic cloves to it and add the olive oil. Fry the garlic on a high heat for 2 minutes. Add the balsamic vinegar and water and bring to the boil, then simmer gently for 10 minutes.

5. Add the sugar, rosemary, chopped thyme and ¼ teaspoon salt to the garlic in the pan. Continue simmering over a medium heat for 10 minutes, or until most of the liquid has evaporated and the garlic cloves are coated in a dark caramel syrup. Set aside.

6. To assemble the tart, crumble both types of goat’s cheese into pieces and scatter them over the bottom of the pastry case. Spoon the garlic cloves and their syrup evenly over the cheese – the deliciously caramelised garlic will try to stick together in clumps.

7. In a jug, whisk together the eggs, creams, ½ teaspoon salt and some black pepper. Pour this mixture over the tart filling to fill the gaps, making sure that you can still see the garlic and cheese peeping through.

8. Reduce the oven temperature to 160°C/Gas Mark 3 and put the tart in the oven. Bake for 35-45 minutes, or until the tart filling has set and the top is golden brown. In my oven, this took almost an hour in total. If the tart’s golden and cooked on top but still wobbly, remove it from the oven and don’t worry – it will set as it cools. Leave the tart to cool a little.

9. When you’re ready to serve, remove the tart from its tin, trimming and tidying the pastry edge if needed, lay a few sprigs of thyme on top and serve warm (but not burning hot) with a crisp salad.

On Martha, he used American measurements, but my copy is from England so you have to ask Martha for conversions.

Or, you could pick up your own copy, which is what we would suggest. Ottolenghi has a nifty blog and he talks about his trip to New York, so, do check it out.

PERFECT CHEESECAKE TRICK

I love any kind of cheesecake. It doesn't make much difference, to me, whether it is perfectly baked or if it has a big old crack in the middle of it ... I will enjoy it just as much.

HOWEVER, there ARE those special occasions where you want your cheesecake to impress company, so here is a trick that has not failed me yet: bake your cheesecake at a super low temperature for a longer time. It will come out ultra-creamy and will NOT crack.


CRUST
2 cups graham cracker crumbs
¼ cup granulated sugar
1/3 cup melted butter

Spray the bottom and sides of your springform pan with a little cooking spray. Mix everything well and press into the bottom of a 9" springform pan. Bake at 300 for 8 minutes. Set aside to cool.

(4)  8 ounce packages of cream cheese (room temperature)
1 cup sugar
5 eggs (room temperature)
1 tablespoon vanilla extract

Preheat oven to 350.  Beat the cream cheese in a large bowl until it is light and smooth. Gradually beat in the sugar. Add the eggs, one at a time, beating well after each egg. Mix in vanilla.

Pour over graham cracker crust and smooth the top. Set the pan on a heavy cookie sheet and bake at 350 for fifteen minutes, then TURN YOUR OVEN DOWN TO 200 and bake for 75 more minutes. DON'T FORGET TO TURN THE OVEN DOWN!!!!!!!!!!!  After 75 minutes, the center of the cheesecake will be almost set. Take it out of the oven and loosen the sides of the cheesecake by running a VERY thin blade around the edge. Leave it in the pan and let  it cool to room temperature before putting in the fridge. Chill for several hours, or better yet, overnight.


PRALINE TOPPING (this is sinfully delicious!!)

¼ cup butter
1¼ cups brown sugar (packed)
16 large marshmallows
2 tablespoons light corn syrup
dash of salt
1 cup of evaporated (canned) milk
½ cup toasted pecans (or almonds)
1 teaspoon vanilla extract


Melt the butter in a saucepan over low heat. Stir in the sugar, marshmallows, syrup and salt. Bring to a boil over low heat, stirring constantly. Simmer gently for one minute. Remove from heat and cool for five minutes. Stir in evaporated milk, nuts and vanilla, mix well. This is good warm or cold over the cheese cake. 

Saturday, May 28, 2011

Ottolenghi: The Cookbook


We have been spending a lot of cookbook time recently with Yotam Ottolenghi. Ottolenghi is an Israeli-born English chef. He has a a series of restaurants in England and this cookbook was all the rage. The cooking is not defined by a particular region though the influences are very Mediterranean and Middle Eastern. There is a lot of emphasis on vegetables and grains. He loves bold, bright flavors and cares about the ingredients. Of a philosophy of food Ottolenghi says:

"We take our food extremely seriously. We make everything – be it marshmallows, an elaborate upside down pear cake or a French bean salad - right from scratch. We don’t buy anything other than raw ingredients, and we only produce things that we would want to eat ourselves. We don’t use colouring or preservatives, we don’t freeze and we don’t refrigerate for long periods. We buy mostly local produce (that is, British and European), very often organic, and we cook to feed and to share, applying the same instincts as a home cook. But we are also perfectionists; testing and re-testing each dish until we get it just right; creating and maintaining beautiful and serene dining environments."

In 2002 he oped Ottolenghi, which was like a small deli and today there are 2 restaurants and three carry-outs. One of our favorites is a sweet potato gratin, so we are always on the lookout for chefs who make our humble favorite in new ways. This is a very interesting twist on our fave. the potatoes are rather thick and the skin is kept on. They are baked in a standing position for about an hour, then the cream is added for another half hour.


Sweet Potato Gratin

6 medium sweet potatoes
2 1/2 cloves garlic
250 ml heavy cream
5 tablespoon fresh sage
2 teaspoon coarse sea salt
1/2 teaspoon ground black pepper

Directions

Preheat the oven to 200C/Gas mark 6. Wash the sweet potatoes (do not peel them) and cut them into discs 5mm thick.

In a bowl, mix together the sweet potatoes, sage, garlic, salt and pepper. Arrange the slices of sweet potato in a deep, medium sized oven-proof dish by taking tight packs of them and standing them upright, next to each other. They should fit together quite tightly so you get parallel lines of sweet potato slices (skins showing) along the length or width of the dish. Throw any remaining bits of garlic or sage from the bowl over the potatoes.

Cover the dish with foil, place in the oven and roast for 45 minutes. Remove the foil and pour the cream evenly over the potatoes. Roast, uncovered, for a further 25 minutes. The cream should have thickened by now. Stick a sharp knife in different places in the dish to make sure the potatoes are cooked. They should be totally soft.

This is a great way to solve that problem of getting the potatoes fully cooked. By standing them up, the potatoes have a nice visual look, too.

We liked this cookbook so much, that we could not wait for his next book to arrive...

Saturday, May 21, 2011

SWEDISH PANCAKES

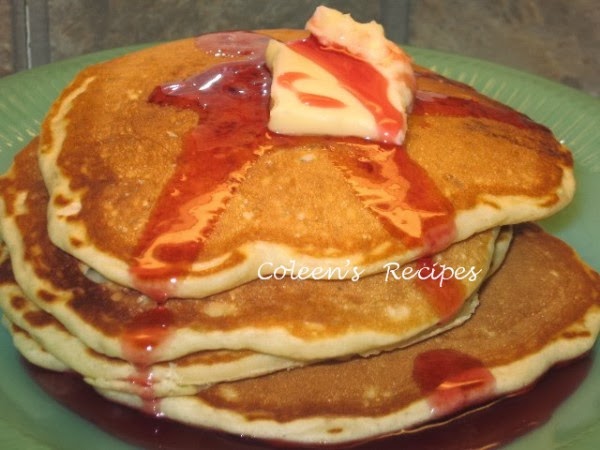
Monica, over at  Lick the Bowl Good, recently posted a recipe for Swedish pancakes that caught my eye for a couple of reasons. Not only did they look tasty, but the recipe made a modest amount of batter... just the right amount for two or three hungry people (most pancake recipes feed an army).

 
Monica's pancakes were petite little beauties, but I knew that wouldn't go over too well with Hubby, so I made "macho man" size pancakes.  They were absolutely delicious and very quick to make.

1 cup all purpose flour
1 teaspoon granulated sugar
¾ teaspoon baking powder
½ teaspoon baking soda
½ teaspoon salt
1 egg
1 cup buttermilk
1 tablespoon melted butter
I added ½ teaspoon vanilla that wasn't on the original recipe.

I put the dry ingredients in a bowl and mixed them with my whisk. I then put the wet ingredients in a different bowl and gave them a whisk. I then gently stirred  (with wooden spoon) the dry ingredients into the wet ingredients, just until blended. Monica cautions not to over mix or the pancakes will be tough (small lumps in the batter are OK).

Cook on preheated  (medium) griddle that has been lightly buttered (I used cooking spray then wiped it off with a paper towel).

Monica suggests cooking 2 tablespoons of batter for each pancake, but I used about half a cup to make larger pancakes. Once the edges of the pancakes are slightly dry, flip them over and cook the other side until golden.

This is a beautiful batter and fluffs up very nicely, giving you a nice light pancake, we loved them.

Thank you Monica!!

Thursday, May 19, 2011

PECAN PIE MINI-MUFFINS

These little gems taste just like a Pecan Tassie. They are made out of 6 every day ingredients and are great with a morning cup of tea, or the lunch box or a long car ride (not at all messy). These are Hubby's "new" favorite snack. Store covered.
1 cup light brown sugar
½ cup flour
2 eggs
2/3 cup soft butter
½ teaspoon vanilla
1 cup chopped pecans

Preheat oven to 350°. Grease and flour a mini muffin pan (or spray with a cooking spray that has flour in it, like Bakers Joy). Mix the wet ingredients in a medium size bowl and then stir in the dry ingredients, its just that simple!!

Mix long enough to just get the batter smooth. Make sure you use the MINI muffin pans (not cupcake size). Fill cups with one tablespoon batter each (makes 24). Bake for 17 minutes.

NOTE: Dusting pan with flour is important.

NOTE: My oven cooked these in 16 minutes.

NOTE: Taking these out of the pan is the only (mildly) tricky part of this recipe. Letting the muffins cool for 2 or 3 minutes before you try to remove them from the pan will help a lot, but don't leave them in the pan longer than than that, since they will get harder to remove from the pan as they cool.

NOTE: Slide a  thin knife gently around the sides of the muffins, then gently lift them out using the knife.

NOTE: If you keep these muffins covered well, they will stay soft for a long time (they tend to get a little crispy around the edges if left out in the air).

Wednesday, May 18, 2011

Fannie's Last Supper


I admit I am not a great fan of Chris Kimball. He boarders on the obsessively geeky and I find him a bit dry and didactic. That being said, all his obsessiveness has come up with some pretty cool ideas. I never make pumpkin cheesecake without first draining the canned pumpkin on paper towel and I would have never thought of that if not for Mr. Kimball.

When I saw that he had written a book about re-creating a menu from an old cookbook, well I had to read it. I love nothing better than gleaning elaborate menus form period publications and bringing them to fruition. If ever there was a place for Chris Kimball's fussiness, it is in re-creating a meal from Fannie Farmer's 1896 Cookbook.

Don't be discouraged by some of the lukewarm reviews of this book. Many people were initially critical of Kimball for tweaking the recipes. That is what Kimball does. He is Mr. Tweaker. There is no way that you can give Chris Kimball a recipe and not have him screw with it all day long and into the next.

Everything that Kimball changed was changed for a reason that he explained. The book is fun history of cooking, Boston, manners and Victorians. And for all the things he could have easily cut corners on, like using prepared gelatin, he went the distance like making his own gelatin from calves feet. Along with a rather funny explanation of how he went about finding calves feet. Here is his recipe if you are so inclined.


Homemade Gelatin From Calves Feet

This was a much less smelly and also an easier proposition than we had thought originally. Yes, you do need to purchase split calves' feet, but the good news is that this gelatin base can be used to thicken a great many jellies or puddings. We decided to use this gelatin in our lemon jelly but used regular powdered gelatin in the other two jelly molds. We did detect a slight aftertaste to the calves' foot gelatin, and did not want the flavor of the spatlese or rhubarb jellies to be affected.

4 calves' feet, split in two
1 tablespoon sugar
1/4 cup lemon juice, from 2 lemons
1 cup white wine
Water

1. Soak split calves' feet in cold water for 1 hour; drain. Transfer soaked feet to 17-quart stockpot, cover with water and bring to boil for 10 minutes; drain. Return feet to stockpot, and add sugar, lemon juice, wine and 6 quarts of water to cover. Bring to boil, and reduce heat to maintain gentle simmer; simmer for 4 hours. Remove and discard feet; skim fat; strain liquid through fine mesh strainer. Let cool to room temperature. Transfer to refrigerator; chill overnight.

2. When it firms up, remove any fat from the top, wash the surface with warm water to remove all traces of grease. Lift out jelly, without disturbing sediment at the bottom. Use per recipe for Lemon Jelly Mold.

Yields about 3 quarts


Kimball even went so far as to procure and assemble an authentic Victorian cast iron stove into his Boston brownstone. It sounds exactly like a gigantic fire waiting to happen. In the end the whole thing was filmed for PBS. I never saw the documentary, but the book was delightful. I admit I read the selections on finding and refurbishing the stove first.


This book is a delight for those of you who are interested in the Victorian era and really I don't hold it against him that decided to make a zippier desert. Really! I am sure Fannie would have been proud.

Check out more recipes and info at Fannie's Last Supper.

Tuesday, May 10, 2011

CHOCOLATE CREAM CHEESE FROSTING FOR MY BIRTHDAY

Follow Me on Pinterest
Can it be my birthday again, already? They seem to come every six months lately. I usually treat myself to a baked goody on my birthday; come to think of it, it almost always involves chocolate, big surprise!! This is my favorite chocolate frosting, it is quick, easy, deliciously smooth on the tongue and it pipes beautifully!!!


¼ cup butter (warm but not melted)
½ cup baking cocoa
8 ounces cream cheese (room temperature)
1 teaspoon vanilla
4 cups powdered sugar

Mix the cocoa and vanilla into the warm (but not melted) butter, beat until smooth, set aside. Beat the cream cheese until smooth (scrape the sides of the bowl so that you get it all mixed), then add the butter-chocolate mixture and beat until it is all smooth.

Beat in the powdered sugar, one cup at a time, beating well after each cup until smooth and enjoy.

NOTE: If I'm feeling adventurous, I add a little orange zest to this frosting.

Sunday, May 8, 2011

MOCK PECAN PIE

I know it is hard to imagine a pecan pie without pecans, right? Well, whether you have nut allergies, or you are like me and find it harder and harder to pay nearly $10 a pound for pecans, you might give this fun, quick and easy recipe a try.
 This recipe uses plain old rolled oats instead of pecans. Sounds strange, I know, but the oats soak in the butter and sugars and bake into a golden brown and crunchy topping that sits on top of a traditional soft sweet filling.  As a test, I gave Picky Picky Hubby a slice after dinner and never mentioned the rolled oats. He ate a few bites, declared the pie a "winner" and then said, "I thought you said you were out of nuts" (he thought he was eating nuts)!! It really is tasty.

¾ cup light corn syrup
¾ cup granulated sugar
3 eggs lightly beaten
1 cup rolled oats (quick cooking is OK if necessary)
¼ cup melted butter
2 teaspoons vanilla
9" unbaked pie crust
This takes about "three seconds" to mix up; just mix everything in a bowl (with a whisk) until smooth and pour into unbaked 9" pie shell.  Bake in preheated 350 degree oven for 60 minutes or until knife inserted in middle comes out clean (my oven took 50 minutes).  That's it!! Quick and easy.

The baked "nut" topping is nice and crunchy and does not taste like oatmeal at all!!  Picky Picky Hubby has told me how much he likes the pie THREE times this evening (that's rare).

Thursday, May 5, 2011

CLASSIC JELLY ROLL CAKE

This is an old classic recipe. I see variations of it online (with a whipped cream filling) however, this recipe holds true to its name JELLY roll, and was filled with jam. It is definitely a crowd pleaser. This one is made with my raspberry preserves and it is one of Picky Picky Hubbies favorites.

3 eggs
1 cup granulated sugar
1 teaspoon butter extract
1 teaspoon vanilla extract
1/3 cup of water (see note)

1 cup of CAKE FLOUR (see note)
1 teaspoon baking powder
¼ teaspoon salt
1 cup jelly or jam
powdered sugar

Preheat oven to 375°. Line a 10” x 15” jelly roll pan with parchment paper and spray the parchment paper with cooking spray, set aside.

Lay out a clean kitchen towel, preferably one with little or no texture type surface (especially not terry cloth). Dust a generous layer of powdered sugar onto the surface of the towel (the same dimensions as the pan or even a couple inches bigger).


Beat the eggs, on high speed, until very thick and lemon colored (5 minutes). Gradually add sugar while the mixer is running. Put butter extract into a 1/3 measuring cup and then fill the rest of the measuring cup with water (water + butter extract should = 1/3 cup). Add vanilla and water/butter extracts to batter and mix well. Add flour, baking powder and salt to the egg mixture and beat just until batter is smooth. Pour into the prepared pan. Bake 12 to 15 minutes or until toothpick inserted in center of cake comes out clean. Slide a knife around the cake edges to loosen it from the pan. While cake is still hot, turn it out onto the powder sugared kitchen towel. Immediately roll up the cake (ALONG WITH THE KITCHEN TOWEL) starting with the narrow end, like this

Set the kitchen towel wrapped cake on a baking rack to cool for 45 minutes. When it has cooled for 45 minutes, unroll the cake/towel (gently peeling the towel away from the cake as you unroll). The surface now facing you will have no powdered sugar on it. Stir the preserves well, to get them all loosened up, then spread it on the cake. Gently roll the cake back up (with NO towel this time). Wrap the whole thing in plastic wrap and let it cool completely. When cooled, take plastic off and top with glaze.


JELLY ROLL CAKE GLAZE

1/3 cup of butter melted
2 cups powdered sugar
1½ teaspoons vanilla extract
½ teaspoon almond extract
2 tablespoons of milk


Whisk everything together. If it seems too thick, add another tablespoon of milk. If it seems to thin, add a few more tablespoons of powdered sugar. Spoon glaze onto jelly roll and let it drip down sides.

NOTE: Any kind of kitchen towel will work, but the more textured it is, the more the cake will want to stick to it. If you only have textured kitchen towels (like me) just be careful and pull the towel off of your cake slowly and it will come away fine.

NOTE: The cake will continue to get more and more moist (the moisture from the jam works its way through the cake). So the jelly roll will be at its prime after it has been covered a few hours.


Some cooks feel intimidated by jelly roll cakes, but this recipe is nearly a foolproof. The main trick to rolling cake is that it has to be a special sponge type cake to work (don't just try ANY old cake recipe).

Here are a couple more tips:
Remove the HOT cake from the pan and trim any dry edges (that will keep it from cracking when you roll it).

Roll the cake AND THE TOWEL up immediately, don't let it cool down. Let it sit for a full 45 minutes then unroll and spread jam and roll back up immediately. Lay it on plastic wrap and wrap tightly. This will help also help the cake from mis-shaping while it cools (although I've never had a problem with that).
The biggest trick is to get the cake right in the first place. Whip those eggs a full five minutes. The pan size is another thing. For this recipe it HAS to be a 10x15. A thinner cake rolls easier than a thicker cake.
 
If you don't have butter extract...just add an extra teaspoon of vanilla OR a teaspoon of rum extract.

Friday, April 29, 2011

Bake & Decorate

Today was the Wedding of Prince William and Catherine Middleton. (I am sure that you forgot and are just now amazed that it happened without you. Never fear, it is being shown over and over and over again throughout today ad probably for the next few months.)

Still, it is only fitting and proper that we feature a cookbook by the baker who is in charge of the Wedding Cake. Fiona Cairns has written a a lovely little baking book called Bake & Decorate. The Book came put before she got the Royal gig, so in true marketing fashion, she will be releasing a new book just in time for Christmas.


Here is Fiona with finished Wedding Cake.

This cake adorns the cover of Bake & Decorate. Care to speculate what is on the cover of the next book?

Pansy Wreath Cake

175g unsalted butter, softened, plus more for the tin
175g self-raising flour
2 eggs, lightly beaten
175g golden caster sugar
the zest, finely grated, and juice of
1 large unwaxed lemon

For the topping

the juice of 1 large lemon
100g white granulated sugar

Preheat the oven to 180C/gas mark 4. Lightly butter an 18cm, 7.5cm deep, round springform tin and line the base and sides with baking parchment. Sift the flour with a pinch of salt into a bowl and set aside.

Melt the butter in a small pan and set aside to cool slightly. Using an electric whisk or mixer, beat the eggs and sugar together until very light and fluffy (about five minutes). Blend in the melted butter; then very gently fold in the flour and zest. Finally, slowly fold in the juice.

Pour the batter into the tin and bake for 30-35 minutes or until the cake springs back to the touch, or a skewer inserted into the centre comes out clean. Meanwhile, make the crunchy topping by mixing the juice and sugar together. Immediately the cake comes from the oven, prick tiny holes all over it with a fine skewer or cocktail stick. Pour the lemon syrup evenly all over the surface. Leave to cool completely in the tin.


To decorate

150g icing sugar, sifted
purple food colour
20-25 crystallised small violas and pansies
50g bag white royal icing

Place the cake upside down on your serving plate or cake stand. Tip the icing sugar into a small bowl and add 1½-2 tablespoons of water and a tiny amount of purple food colour. The icing should be thick enough to coat the back of a spoon. Spoon it over the cake and allow it to drizzle down the sides. Arrange the violas and pansies in a circle, using the royal icing to affix them, if you like, then place a few in the middle of the cake.

Check out Prince William's cake here.

Eating Royally --REDUX


With the wedding today, we felt that we should revisit Eating Royally. Mainly we felt we should re-visit it because between the pages of this book rests the recipe for Prince William's Grooms Cake.

The actual cake is being made by McVitie's Cake Company. It is being made with the "secret" royal family recipe. McVitie's has been making cakes for royal weddings and christenings since the wedding in 1893 of the Duke and Duchess of York, who later became King George V and Queen Mary. They made the 60th wedding anniversary cake for the Queen and Prince Phillip in 2007. The United Biscuits Group , who now owns McVitie's says about 1700 McVitie's Rich Tea Biscuits and over 16kg of chocolate will be used in the reception cake.


Darren McGrady, the author of Eating Royally and the chef to Princess Diana included the no-bake chocolate cake in his book. Though The United biscuit Group will not confirm that it is the recipe, it is just too close to deny.

Chocolate Biscuit Cake

1/2 teaspoon soft butter
8 ounces McVities rich tea biscuits
4 ounces soft butter
1/2 cup sugar
4 ounces dark chocolate
1 egg, beaten
8 ounces dark chocolate for icing
1 ounce white chocolate for decoration

1. Line the base of a springform pan with silicone paper, and butter the sides. Break the biscuits into almond-sized pieces and set aside.

2. Cream the sugar and butter in a bowl. Melt 4 ounces dark chocolate and mix with butter, add the beaten egg and mix well. Add biscuits and coat well.

3. Pour into the pan, making sure the bottom is well covered as this will be the top of the cake when it is unmoulded. Let set in a fridge for three hours. Let partially warm outside of the fridge while 8 ounces dark chocolate and white chocolate are melted. Flip cake and drizzle chocolate on top.


Now you too, know the secret.


As for the formal Wedding Cake, Fiona Cairns is in charge. Check out the post here.

For more Royal Wedding info head over to Lucindaville for Etiquette and a Tiara or Two!

Thursday, April 28, 2011

NO FAIL HASHBROWNS FOR THIS WEEKEND

This hash brown recipe is fool proof. It will give you crisp potato patties, just begging for a dash of hot sauce (or ketchup for the kids). The following instructions are for pattys, but you can also spread the mixture out in a big frying pan, then cut into wedges for serving.


3 cups Simply Potatoes (see note below)
¼ cup very thinly sliced green onions
(optional)
2 tablespoons all purpose flour

1 egg (lightly beaten)
1½ teaspoons salt
(or to taste)
¼ teaspoon black pepper
(or to taste)

I use (the shredded hash brown style of) a product called Simply Potatoes (in my store they are sold in the refrigerated section above the eggs), but you can use THAWED Ore Ida shredded (loose) hash browns as well. I have tried fresh potatoes for this recipe and they do NOT work as well as Simply Potatoes or thawed Ore Ida shredded potatoes (fresh potatoes get mushy).
Gently toss the potatoes with the flour, salt and pepper (and onion if you are using it), then gently (I use my hands) mix in the lightly beaten egg. NOTE: I mix the salt & pepper into the egg to make sure the spices are distributed evenly throughout the potatoes.
Pre-heat your heavy frying pan to medium high and brush your skillet with a generous coating of vegetable oil (I like to use my electric frying pan).

Place 1/3 (lightly packed) potato mixture onto HOT, greased frying pan and then gently flatten the mound with your spatula, like this: Fry patties for 4 minutes, per side, or until they are golden brown and crispy.

Drain on paper towels, sprinkle with salt and serve immediately.
I love how these hash brown patties hold together, you can even pick them up and eat them like a commercial hash brown patty, but oh so much better tasting.


NOTE: 3 cups of THAWED Simply Potatoes or Ora Ida equal about a pound.

Monday, April 25, 2011

Goat Meat Milk Cheese


It seems such an obvious statement: 70% of the red meat eaten in the world is goat meat. Duh. And yet, it never crossed my mind. I have eaten my share of goat meat...OK, clearly not my share as 70% of my red meat hasn't been goat. I have had a substantial amount of goat cheese.

Now one might think that writing a cookbook about a protein we Americans (and I use the term lightly) use sparsely would give the authors and air of superiority. We have all picked up those "holier than thou" cookbooks when the author manages to be condescending and didactic all at the same time. Well, Goat: Meat, Milk, Cheese by Bruce Weinstein and Mark Scarbrough is not in that category. The authors are accessible and funny and informative... did I mention funny? If you never even look at a goat, you will get a big kick out of this book. (And if have read as many stuffy and overbearing cookery books as I have, you will be thrilled at the light yet thoroughly authoritative prose.) And where else, one might ask, will you ever find a cookbook that mentions, even in passing, Derrida?

The main problem with goat (aside from its slightly gamy aroma) is that the darn thing is bony. But hey, you eat quail and fish and they are bony. Got meat is also a mere 244 calories for a 6-ounce serving and less than half the fat of its nearest low fat challenger -- chicken. this could definitely start a Jenny Craig trend.

The book covers that gamut from sweet to savory or rather savory to sweet. There are stews, curries, moles and there are blintzes and brownies (my very favorite brownie is one swirled with goat cheese) and several preparations for cheesy concoctions like fondue and dip. Here is an accessible recipe for goat cheese dumplings. How can you beat that.

Baked Spinach-And-Goat-Cheese Dumplings

One 10-ounce package frozen chopped spinach, thawed
8 ounces fresh chevre or soft goat cheese, at room temperature so that it’s very creamy
4 ounces hard, aged goat cheese, such as goat Gouda, finely grated and divided
3 large egg yolks
3/4 cup semolina flour, plus more for rolling the little dumplings
1 tablespoon finely minced chives or the green part of a scallion
1 teaspoon salt
1/2 teaspoon finely grated lemon zest
1/2 teaspoon freshly ground black pepper
1/4 teaspoon freshly grated nutmeg
1 tablespoon goat butter (or unsalted cow butter, if you must)
1 tablespoon all-purpose flour
1 cup regular or low-fat goat milk (or cow milk, if you must)
2 tablespoons dry white wine or dry vermouth

1. First, grab the frozen spinach in small handfuls and squeeze as hard as you can over the sink to get rid of as much excess moisture as you can. Put the bundles in a big bowl and use a fork to separate the spinach back into bits and threads.

2. Whisk in fresh chevre or goat cheese, half the grated hard goat cheese, the egg yolks, semolina flour, chives, salt, lemon zest, black pepper, and nutmeg. You want a creamy but somewhat stiff mixture, because you’re going to form it into balls.

3. Sprinkle a little more semolina flour onto a clean, dry work surface. Pick up a little bit of the spinach mixture, a little smaller than a golf ball. Roll this in the semolina flour to form an oblong ball, sort of like a football but without the pointed ends. Set aside and continue rolling more, adding more flour to your work surface as need be (but not too much, or the balls will turn gummy). You’ll end up with about 24 dumplings.

4. Bring a large pot of water to a boil over high heat. Add 5 or 6 dumplings. Lower the heat so the water barely simmers. Poach for 10 minutes. Use a slotted spoon to transfer dumplings from the pot to a 9-by-13-inch baking dish or an oblong roasting pan. Then add 5 or 6 more dumplings to the pot and repeat the poaching process again — and again — until all the dumplings are done and in the baking dish or roasting pan. Why not just toss them all into the water at once? Because they’ll crowd the pot and stick together. You want enough space so they can bounce around freely in the simmering water.

5. Position the rack in the center of the oven and preheat oven to 375 degrees.

6. Melt the butter in a small saucepan set over medium-low heat. Whisk in the all-purpose flour. Whisk over the heat for 30 seconds. Then whisk in the milk in dribs and drabs, a little bit each time to form a paste — and then more at a time, although never more than a slow, steady drizzle. Once all the milk is in the pan, whisk in the wine, raise the heat to medium, and whisk until bubbling and slightly thickened, just a minute or so.

7. Pour this sauce over the dumpling balls in the baking dish or roasting pan. Sprinkle the remaining grated cheese over the dish. Bake until the sauce is bubbling and just beginning to brown, about 15 minutes. Cool in the pan for 5 minutes before serving.

Mark my words, before long you will be seeing nifty goat trucks dotting the food scene and at least one NYC restaurant that offers up all goat, all the time. And you will have Bruce Weinstein and Mark Scarbrough to thank.

Tuesday, April 19, 2011

SWEET DINNER ROLLS

This is an "oldie, but a goodie" recipe for a sweet, buttery, dinner roll for your Easter holiday. This recipe can be made ahead of the holidays, partially baked and then just tossed in the oven, to finish baking, just before the big dinner. They are delicious, easy to make and freeze beautifully.


½ cup warm water
1/3 cup white sugar
1 teaspoon salt
½ cup warm milk
1/3 cup soft butter
1 package of dry yeast (see note)
1 egg (room temperature if possible)
3¾ cups all purpose flour

Heat the water and milk until warm (I use the microwave). Put it into the large bowl of a stand mixer and stir in the sugar and yeast. Let it sit for about 10 minutes (it should get foamy). After 10 minutes, add the salt, butter, egg and 1 cup of flour, mix well.

Continue adding the rest of the flour, ½ cup at a time. Stop your stand mixer every once in a while and scrape down the inside of your bowl and turn the entire dough mixture over (this insures that all of the flour gets mixed in completely and evenly).

Remove the dough from the bowl and spray the bowl with cooking spray. Return the dough to the bowl and spritz the top of the dough (a little) with more cooking spray (so the plastic wrap doesn't stick to the dough). Cover the bowl with plastic wrap and place in the warmest part of your kitchen for an hour to raise. Keep in mind that marble counters are not the warmest place to keep your bowl of dough.

After an hour, or after the dough has doubled in size (whichever comes first), push the air out of the dough with your hands. Roll out 12" "ropes" of dough and tie a knot in the middle, like this:
To complete the "knot", tuck one loose end under the roll and bring the other loose end over the top and tuck it inside of the original knot, place in greased muffin tins. They will look like this:
Spritz the top of the rolls with (just a little) cooking spray and cover with plastic wrap again. Let them raise until they are double in size (35-45 minutes).

If you want to partially bake them (they will be like brown & serve rolls), bake in a preheated 325 oven for 10 minutes. Remove from pans and cool completely (then freeze). When it is time to use them, defrost them for about 15 minutes, then bake in a preheated 375 oven for about 8-10 minutes.

If want to bake them right away (after they have risen in the pans), bake in preheated 350 oven for 12-15 minutes (depending on how hot your oven runs, just keep an eye on them after 12 minutes).


NOTE: I buy bulk yeast, so, when a recipe calls for a package of yeast, I just use a tablespoon (that is a little extra, but works well).

Wednesday, April 13, 2011

Sunday's Kitchen: Food & Living at Heide


Let me preface this by saying that Australia has never held any great thrall with me. I suppose if Oprah paid my way to go and visit I might board the plane. That being said, I love Donna Hay and Stephanie Alexander. It was because of Alexander that I ran across Sunday's Kitchen: Food & Living at Heide as she wrote the foreword.

I knew nothing about Sunday Reed but it seems she and her husband, John, we big art patrons in Australia. They purchased a house they called Heide, short for "Heidleberg" and began inviting artist friends to stay there. They wanted a self-sustaining farm with gardens and animals and orchards and they worked for years to make their house magical.

Agnes Goodsir, Portrait of Sunday Baillieu Quinn, Paris 1929


Along the way, Sunday Reed cooked for friends and family and few people who sat at her table forgot the event. Stephanie Alexander met the Reeds once and always remembered the encounter. Heide was made a museum after the Reed's deaths (Sunday died ten days after John). Two curators at the museum, Lesley Harding and Kendrah Morgan produced an exhibition that looked at life at Heide when Sunday was running the house and cooking. They found recipes that Sunday used and several of her annotated cookbooks and produced a book that is part cookbook, part biography, part art history and all fun. It is both warn and scholarly, not always an easy feat. Here is their description of the exhibition:

This exhibition explores life behind-the-scenes at Heide, the celebrated haven for progressive modernist artist and writers. Heide was the home and personal Eden of John and Sunday Reed, two of Australia's most significant art benefactors. Settling on the fifteen acre property in 1935, the Reeds transformed it from a run-down dairy farm into a fertile creative space. They extended their hospitality and resources to now-famous artists such as Sidney Nolan, Albert Tucker, Joy Hester and Charles Blackman and developed a culture of collaboration, eclecticism and idealism which helped change the course of Australian art.

At the centre of activity was Sunday Reed, a passionate cook and gardener, who ensured the artists she championed received sustenance for the body, not just the mind. Drawing on her experiences in the south of France, she established two abundant kitchen gardens and developed a ‘garden to table’ approach to cooking, enhanced by fresh milk, cream, butter and eggs all produced at Heide. This emphasis on subsistence living, coupled with a self-styled domestic aesthetic, became an inspirational model for those in the Reeds’ wider circle.


Sunday Reed was greatly influenced by the time she spent in France. Much of her cooking came with a French influence. One of her specialities was chocolate mousse. It is an extremely simple recipe but the finished product is lovely.

Chocolate Mousse

115g chocolate
4 eggs, separated

Melt the chocolate, allow to cool a little, then work egg yolks in well. Whip the egg whites until stiff and fold them into the chocolate mixture a little at a time. Pour into a glass dish and chill.


Well, I admit, I knew nothing about the Reed's or Heide but I am convinced that really need to visit. Oprah, are you listening?

Monday, April 11, 2011

365 Cakes and Cookies


Marion Harland was a prolific cookbook author and recipe writer at the turn of the twentieth century. She had the kind of name recognition that lent itself to selling books, so featuring some of her recipes and adding her name to a cookbook was a good way to give a book a leg up on sales. We have often written about cookbook trends and the “recipe of the day” style was popular during this era.

365 Cakes and Cookies was published in 1904. It is a testament to the bakers who used books like these that they were able to get edible cakes and cookies form the scant instructions. Of course, at the time the book was compiled, there were few commercial bakeries, so baking was a task that most cooks knew how to accomplish.


Here is today’s recipe:

April 11 – Pistachio Biscuits

Make a batter with 3 eggs, 1/2 cupful of powdered sugar, 1/2 cupful of flour and the grated rind of 1 lemon. Put the mixture by teaspoonfuls on the baking sheet, upon which has been spread a greased paper. Dust with granulated sugar, and when baked, cover the tops with white frosting and sprinkle with chopped pistachio nuts.


It’s funny that this type of book is explicit in there being 365 recipes. What happens during a leap year? Alas, it is the one day of the year when there are no cakes or cookies. So if your Birthday is April 29th there will be no cake. Sorry.